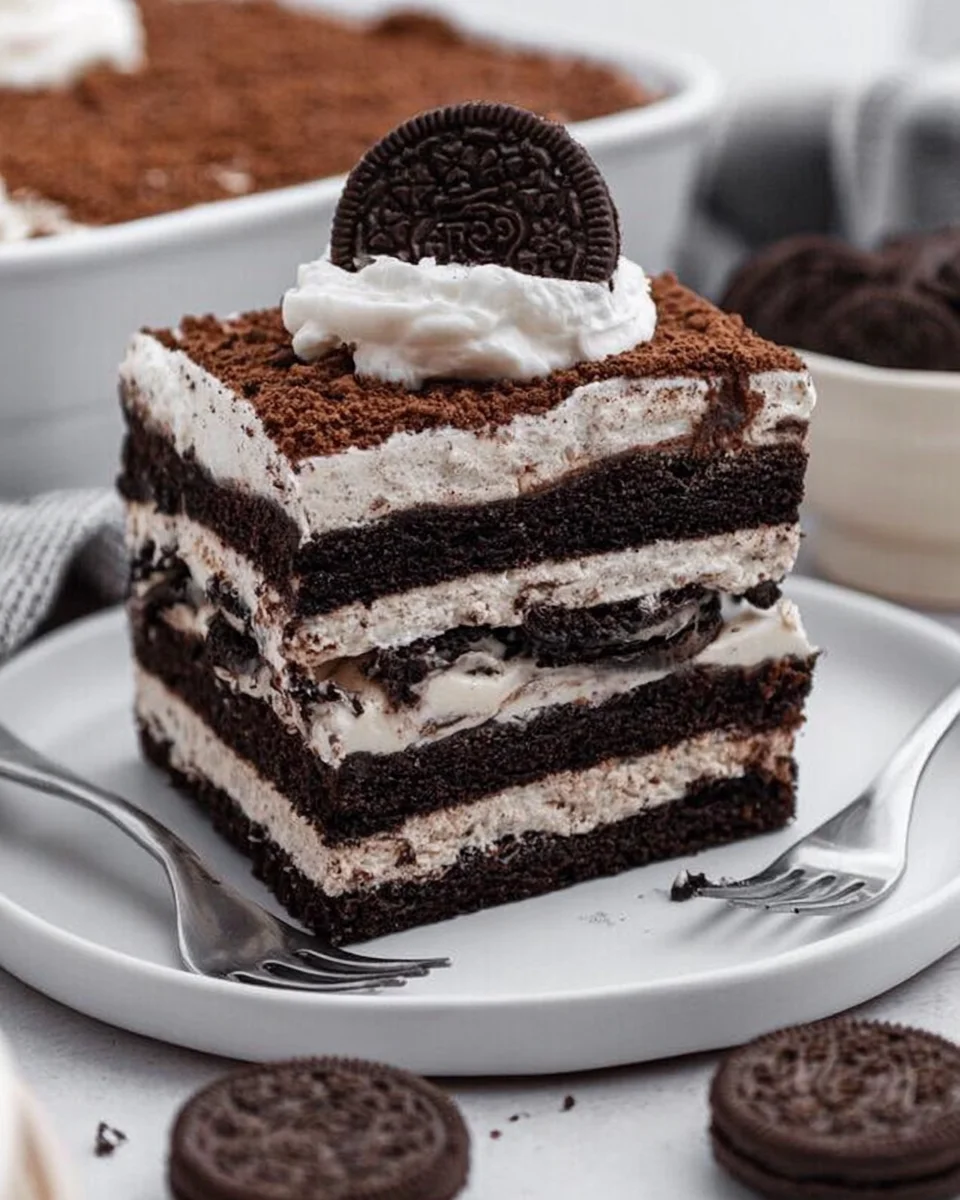
There’s something magical about dessert that brings back memories of childhood. Whether it was a family gathering or a simple weekend treat, desserts like Oreo Lasagna always brought smiles to our faces. This delightful dessert is not only easy to make, but it’s also quick to prepare and unbelievably delicious. You’ll find yourself making it time and time again, each time creating new memories with friends and family.
Why You’ll Love Oreo Lasagna
- Fast
- Easy
- Giftable
- Crowd-pleasing
Ingredients
- 36 Oreo cookies: The star of the show, providing that rich chocolate flavor.
- 1/2 cup unsalted butter, melted: This helps bind the crust together.
- 8 oz cream cheese, softened: Adds a creamy texture and a rich taste.
- 1/2 cup powdered sugar: Sweetens the cream cheese layer perfectly.
- 1/2 tsp vanilla extract: Enhances the flavors throughout the dessert.
- 3 cups whipped topping (like Cool Whip): Lightens up the dessert and adds fluffiness.
- 2 (3.9 oz) packages chocolate instant pudding mix: The chocolate layer you won’t want to miss!
- 3 1/4 cups milk: Needed to prepare the pudding mix.
- 1/2 cup chocolate chips (optional for garnish): A sweet finishing touch.
How to Make Oreo Lasagna
Let’s dive into the fun part! Making Oreo Lasagna is as simple as the ingredients list suggests. Here’s how you can whip it up:
- Prepare the Oreo Crust: In a food processor, crush the Oreo cookies into fine crumbs. In a mixing bowl, combine the crushed Oreos with the melted butter until well mixed. Press the Oreo mixture firmly into the bottom of a 9×13 inch baking dish to form the crust. Set aside.
- Make the Cream Cheese Layer: In a medium bowl, beat the softened cream cheese, powdered sugar, and vanilla extract until smooth and creamy. Fold in 1 cup of the whipped topping until well combined. Spread the cream cheese mixture evenly over the Oreo crust.
- Prepare the Chocolate Pudding Layer: In a separate bowl, whisk together the chocolate pudding mix and milk until well combined and thickened (about 2 minutes). Pour the pudding mixture over the cream cheese layer, spreading it evenly.
- Add the Whipped Topping: Spread the remaining whipped topping over the pudding layer, smoothing it out with a spatula.
- Chill: Cover the lasagna with plastic wrap and refrigerate for at least 4 hours or until set.
- Serve: Before serving, sprinkle chocolate chips on top for garnish if desired. Cut into squares and enjoy!
Substitutions & Additions
If you’re looking to customize your Oreo Lasagna, there are plenty of options. You can swap out the Oreo cookies for another favorite cookie, like chocolate chip or peanut butter. For a little twist, consider adding a layer of sliced bananas or strawberries between the cream cheese and pudding layers. The possibilities are endless!
Tips for Success
- Make sure the cream cheese is softened to avoid lumps in your cream cheese layer.
- Don’t rush the chilling process; this dessert tastes best when it has time to set properly.
- You can prepare this dessert a day in advance, making it a perfect option for gatherings.
How to Store Oreo Lasagna
Oreo Lasagna can be stored in the refrigerator for up to 5 days. Just make sure to keep it covered to maintain freshness. If you have leftovers (which is rare!), just cut out the portions and enjoy them the next day!
FAQs
- Can I freeze Oreo Lasagna? Yes, you can freeze it for up to 2 months. Just make sure to wrap it tightly in plastic wrap and then foil.
- Can I make it gluten-free? Absolutely! Use gluten-free Oreo cookies to make this dessert suitable for gluten-sensitive friends.
And there you have it—your very own Oreo Lasagna that is sure to impress! For more delicious recipes, check out easy s’more bars or strawberry cheesecake Cinnabon rolls for treats you will love!
Don’t forget to follow our Pinterest for more sweet inspiration!
Oreo Lasagna
Ingredients
Equipment
Method
- Step 1: In a food processor, crush the Oreo cookies into fine crumbs. In a mixing bowl, combine the crushed Oreos with the melted butter until well mixed. Press the Oreo mixture firmly into the bottom of a 9x13 inch baking dish to form the crust. Set aside.
- Step 2: In a medium bowl, beat the softened cream cheese, powdered sugar, and vanilla extract until smooth and creamy. Fold in 1 cup of the whipped topping until well combined. Spread the cream cheese mixture evenly over the Oreo crust.
- Step 3: In a separate bowl, whisk together the chocolate pudding mix and milk until well combined and thickened (about 2 minutes). Pour the pudding mixture over the cream cheese layer, spreading it evenly.
- Step 4: Spread the remaining whipped topping over the pudding layer, smoothing it out with a spatula.
- Step 5: Cover the lasagna with plastic wrap and refrigerate for at least 4 hours or until set.
- Step 6: Before serving, sprinkle chocolate chips on top for garnish if desired. Cut into squares and enjoy!