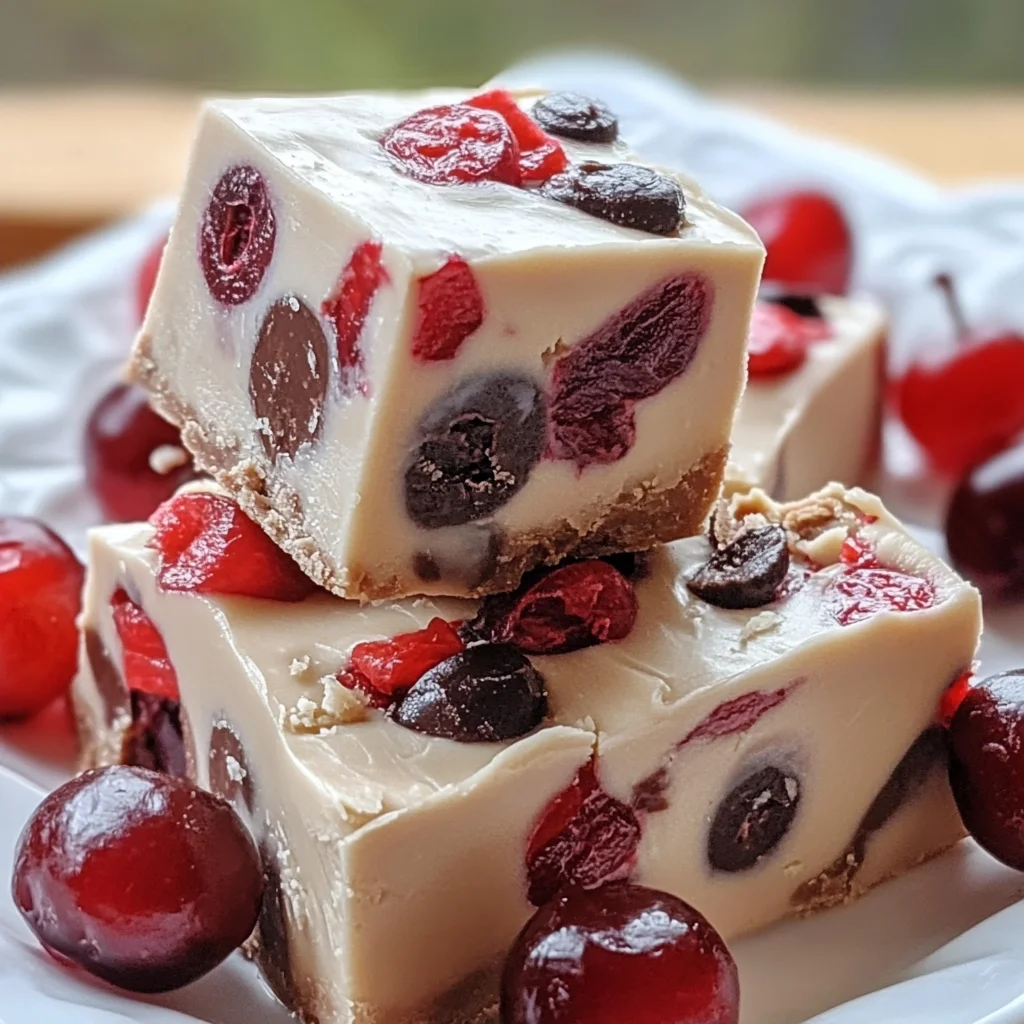
There’s something truly nostalgic about the combination of chocolate and cherries, isn’t there? It brings back memories of warm summer nights and family gatherings filled with laughter and sweet treats. Today, I’m thrilled to share a recipe for Cherry Garcia Fudge that is not only easy to whip up but also a delightful indulgence that will leave your taste buds singing. This quick recipe is perfect for when you’re craving something sweet or need a gift that will surely impress!
Why You’ll Love Cherry Garcia Fudge
- Fast
- Easy
- Giftable
- Crowd-pleasing
Ingredients
Gather these simple ingredients for a fudge that packs both flavor and nostalgia:
- 2 cups semisweet chocolate chips: The star of the show, providing that rich chocolate flavor.
- 1 can (14 ounces) sweetened condensed milk: This will give your fudge that creamy, melt-in-your-mouth texture.
- 1 teaspoon vanilla extract: Just a hint of vanilla elevates the chocolate and cherry flavors.
- 1 cup maraschino cherries, drained and chopped: These sweet gems add a burst of fruity goodness.
- 1/2 cup chopped walnuts or pecans (optional): A crunchy texture that complements the fudge beautifully.
How to Make Cherry Garcia Fudge
Let’s get started on this delectable treat! Follow these simple steps:
- Line an 8-inch square baking dish with parchment paper, leaving a slight overhang for easy removal later.
- In a medium saucepan over low heat, combine the semisweet chocolate chips and sweetened condensed milk. Stir continuously until the chocolate is completely melted and the mixture is smooth.
- Remove the saucepan from heat and stir in the vanilla extract.
- Fold in the chopped maraschino cherries and nuts (if using) until evenly distributed.
- Pour the fudge mixture into the prepared baking dish and spread it evenly.
- Refrigerate for at least 2 hours or until the fudge is set.
- Once set, lift the fudge out of the dish using the parchment paper overhang and cut into squares.
- Store the fudge in an airtight container in the refrigerator.
Substitutions & Additions
If you want to mix things up a bit, here are some fun suggestions:
- Use dark chocolate chips instead of semisweet for a richer taste.
- Try adding a sprinkle of sea salt on top for a sweet and salty combination.
- Swap the maraschino cherries for dried cherries or even raspberries for a different fruity twist.
Tips for Success
- Make sure to stir the chocolate mixture continuously to prevent it from burning.
- Let the fudge cool completely in the fridge before cutting to avoid a gooey mess.
- If you’re making this as a gift, consider wrapping it up in a pretty box with a ribbon!
How to Store Cherry Garcia Fudge
To keep your fudge fresh and delicious:
- Store it in an airtight container in the refrigerator.
- It should last about 1 to 2 weeks, but I doubt it will last that long!
FAQs
Can I use other types of chocolate?
Yes! You can use milk chocolate or dark chocolate based on your preference.
Can I freeze the fudge?
Absolutely! Wrap it tightly and store it in the freezer for up to 3 months.
What other toppings can I add?
Consider adding shredded coconut, mini marshmallows, or even crushed graham crackers for a unique twist!
Now that you know how to make this delightful Cherry Garcia Fudge, I hope you enjoy every delicious bite! It’s perfect for sharing with friends and family or keeping all to yourself for a cozy night in. For more delicious recipes, check out easy S’more Bars or French Onion Soup Pasta for treats you will love!
Don’t forget to follow our Pinterest page for more tempting treats and creative cooking ideas!
Cherry Garcia Fudge
Ingredients
Equipment
Method
- Step 1: Line an 8-inch square baking dish with parchment paper, leaving a slight overhang for easy removal later.
- Step 2: In a medium saucepan over low heat, combine the semisweet chocolate chips and sweetened condensed milk. Stir continuously until the chocolate is completely melted and the mixture is smooth.
- Step 3: Remove the saucepan from heat and stir in the vanilla extract.
- Step 4: Fold in the chopped maraschino cherries and nuts (if using) until evenly distributed.
- Step 5: Pour the fudge mixture into the prepared baking dish and spread it evenly.
- Step 6: Refrigerate for at least 2 hours or until the fudge is set.
- Step 7: Once set, lift the fudge out of the dish using the parchment paper overhang and cut into squares.
- Step 8: Store the fudge in an airtight container in the refrigerator.