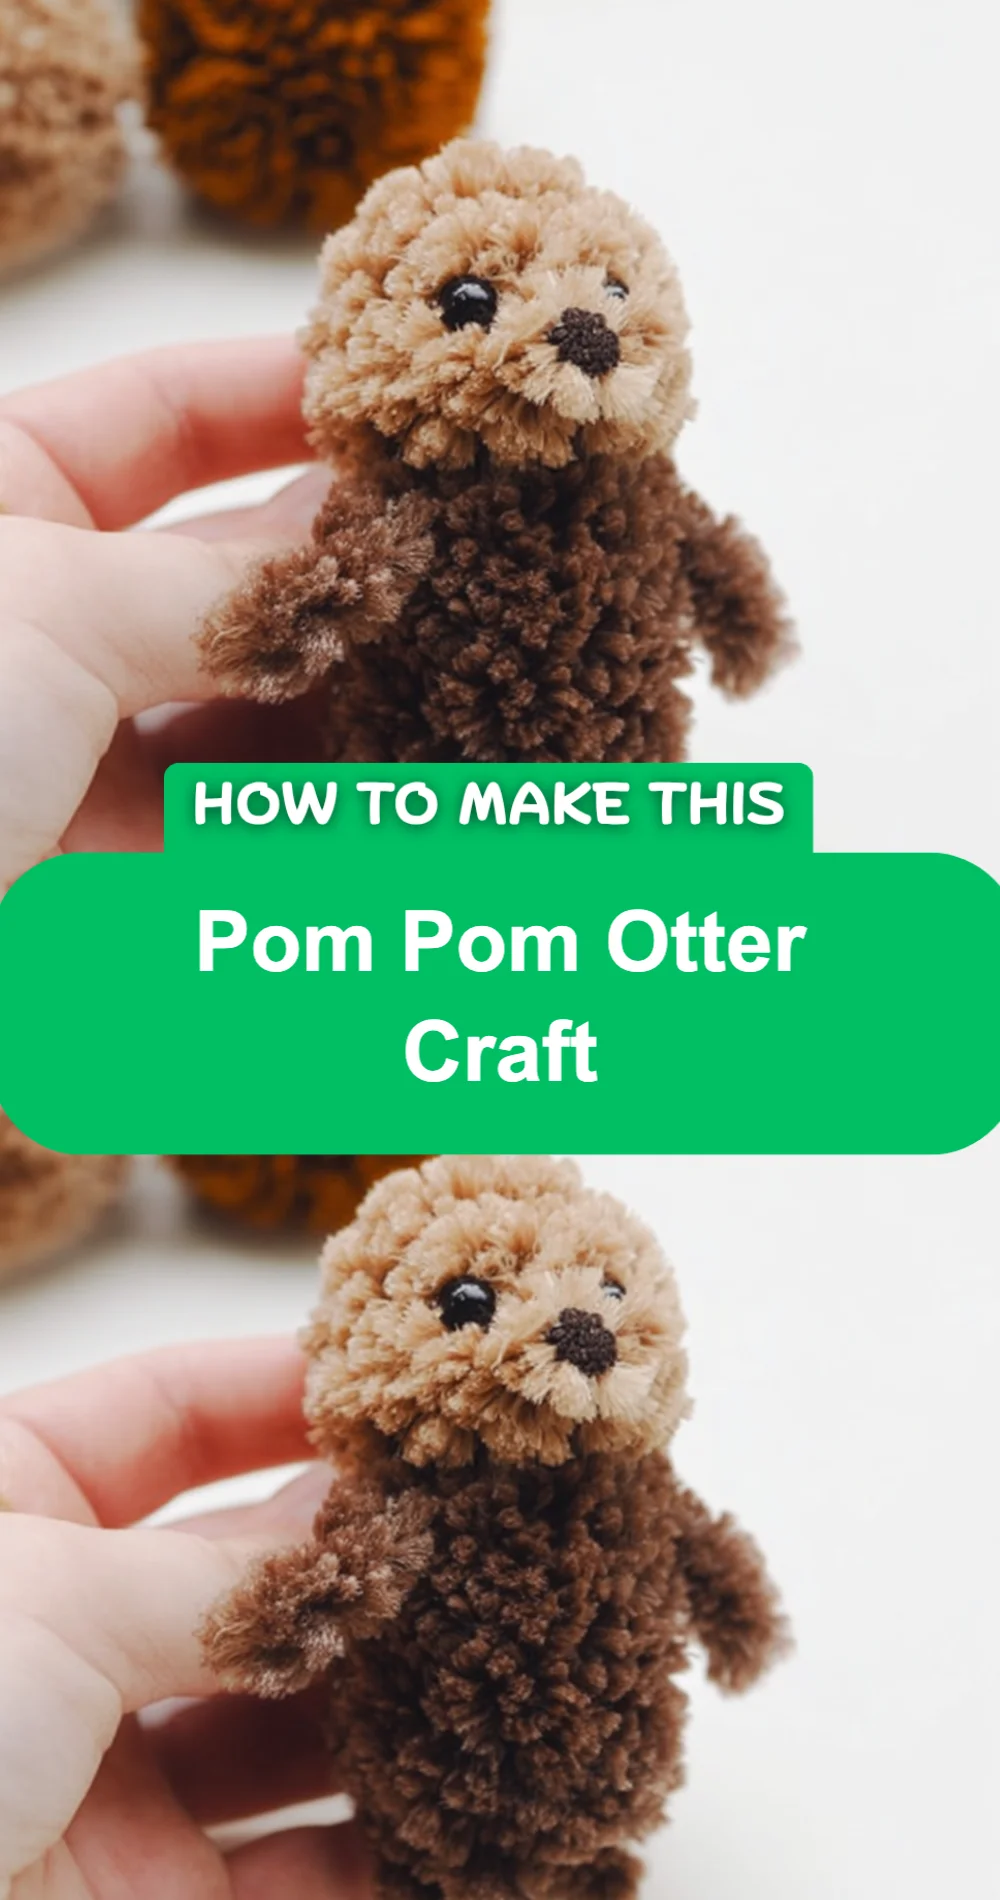
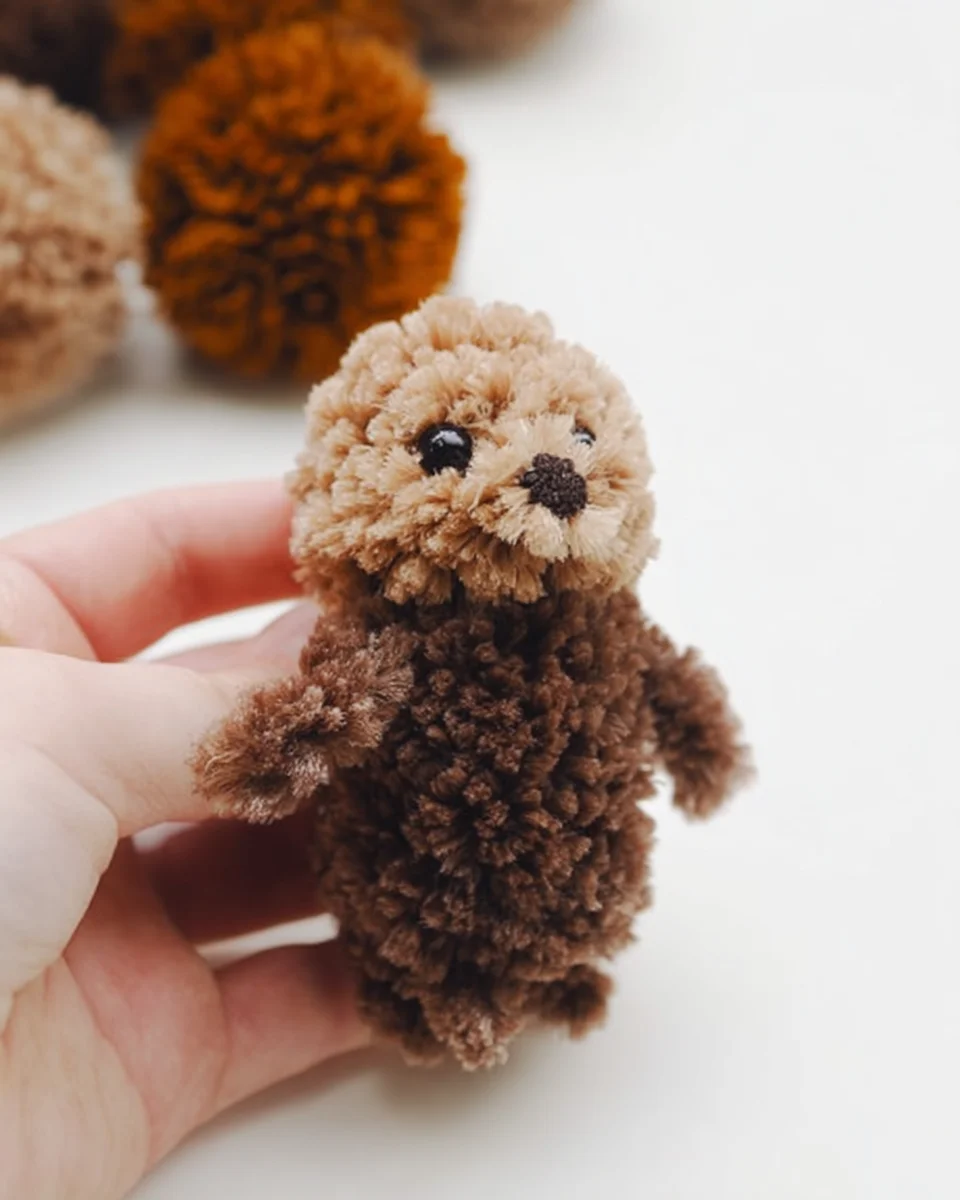
There’s something truly special about creating handmade crafts, especially when they spark joy and creativity. Remember those lazy afternoons spent making delightful creations? Well, let me take you back to those times with this charming Pom Pom Otter Craft! It’s easy, quick, and perfect for both kids and adults. You’ll be surprised at how a few simple materials can bring such joy to your day.
Why You’ll Love Pom Pom Otter Craft
- Fast
- Easy
- Giftable
- Crowd-pleasing
Ingredients
- Brown yarn: This will be the cozy body and head of your otter.
- White yarn: Perfect for adding a cute snout.
- Black yarn: Ideal for the finishing touch on the nose.
- Scissors: A must-have for cutting yarn and felt.
- Craft glue: To hold all your adorable pieces together.
- Googly eyes: These will give your otter a playful personality.
- Felt (brown and white): For the ears and snout, adding some texture.
- Pipe cleaners (optional for whiskers): For a fun whisker effect, if you like!
- Pom pom maker (or cardboard): To shape those fluffy pom poms.
How to Make Pom Pom Otter Craft
Let’s dive right into the crafting! Follow these simple steps to bring your otter to life:
- Make the Pom Poms: Using the brown yarn, create two large pom poms for the body and head of the otter. If you have a pom pom maker, wrap the yarn around it, tie it securely, and cut the loops. Alternatively, you can cut two circles from cardboard, wrap yarn around them, tie, and cut the loops.
- Create the Face: Make a smaller white pom pom for the otter’s snout and attach it to the larger head pom pom using craft glue.
- Add Eyes: Glue two googly eyes onto the head pom pom just above the snout for a cute look.
- Craft Ears: Cut two small circles from the brown felt for the ears and two smaller circles from the white felt for the inner ears. Glue the inner ears onto the brown circles and then glue the ears to the top of the head pom pom.
- Make the Body: Attach the larger pom pom (the body) to the bottom of the head pom pom using craft glue.
- Create Whiskers: If you’re using pipe cleaners, cut three small pieces and glue them to the snout area for whiskers.
- Finishing Touches: Use the black yarn to create a small nose by making a tiny pom pom or simply drawing a nose with a marker. Glue it onto the snout.
- Display: Allow the glue to dry completely. Your pom pom otter is now ready to be displayed or played with!
Substitutions & Additions
If you’re feeling extra creative, why not try different colors for your otter? You could make a fun rainbow otter or even use glitter yarn for a sparkly effect! Just remember to keep the basic structure the same, and let your imagination run wild.
Tips for Success
- Common Mistakes: Make sure to tie your pom poms tightly so they hold their shape well.
- Prep-Ahead Ideas: You can cut all your felt pieces and yarn ahead of time, making the crafting process smoother and more enjoyable.
How to Store Pom Pom Otter Craft
Once your adorable otter is complete, store it in a cool, dry place. If you want to keep it safe from dust, consider placing it in a clear container or a decorative box. This way, you can enjoy your creation for years to come!
FAQs
Can I use different materials for the pom poms?
Yes! You can use different types of yarn or even fabric scraps if you prefer.
How long will this craft take?
This pom pom otter can be made in about 30 minutes to an hour, depending on your crafting speed.
Is this craft suitable for kids?
Absolutely! Just supervise younger kids with scissors and glue.
What else can I do with pom poms?
You can create garlands, keychains, or even use them in other crafts like this rock candy project for a sweet addition!
Crafting is a wonderful way to express creativity, and this Pom Pom Otter Craft is no exception. For more delicious recipes, check out easy s’more bars or blueberry swirl yogurt bites for treats you will love!
Ready to get crafting? I can’t wait to see your adorable otters come to life. Don’t forget to share your creations on Pinterest!
Pom Pom Otter Craft
Ingredients
Equipment
Method
- Step 1: Using the brown yarn, create two large pom poms for the body and head of the otter. If you have a pom pom maker, wrap the yarn around it, tie it securely, and cut the loops.
- Step 2: Make a smaller white pom pom for the otter's snout and attach it to the larger head pom pom using craft glue.
- Step 3: Glue two googly eyes onto the head pom pom just above the snout for a cute look.
- Step 4: Cut two small circles from the brown felt for the ears and two smaller circles from the white felt for the inner ears. Glue the inner ears onto the brown circles and then glue the ears to the top of the head pom pom.
- Step 5: Attach the larger pom pom (the body) to the bottom of the head pom pom using craft glue.
- Step 6: If you're using pipe cleaners, cut three small pieces and glue them to the snout area for whiskers.
- Step 7: Use the black yarn to create a small nose by making a tiny pom pom or simply drawing a nose with a marker. Glue it onto the snout.
- Step 8: Allow the glue to dry completely. Your pom pom otter is now ready to be displayed or played with!
Notes