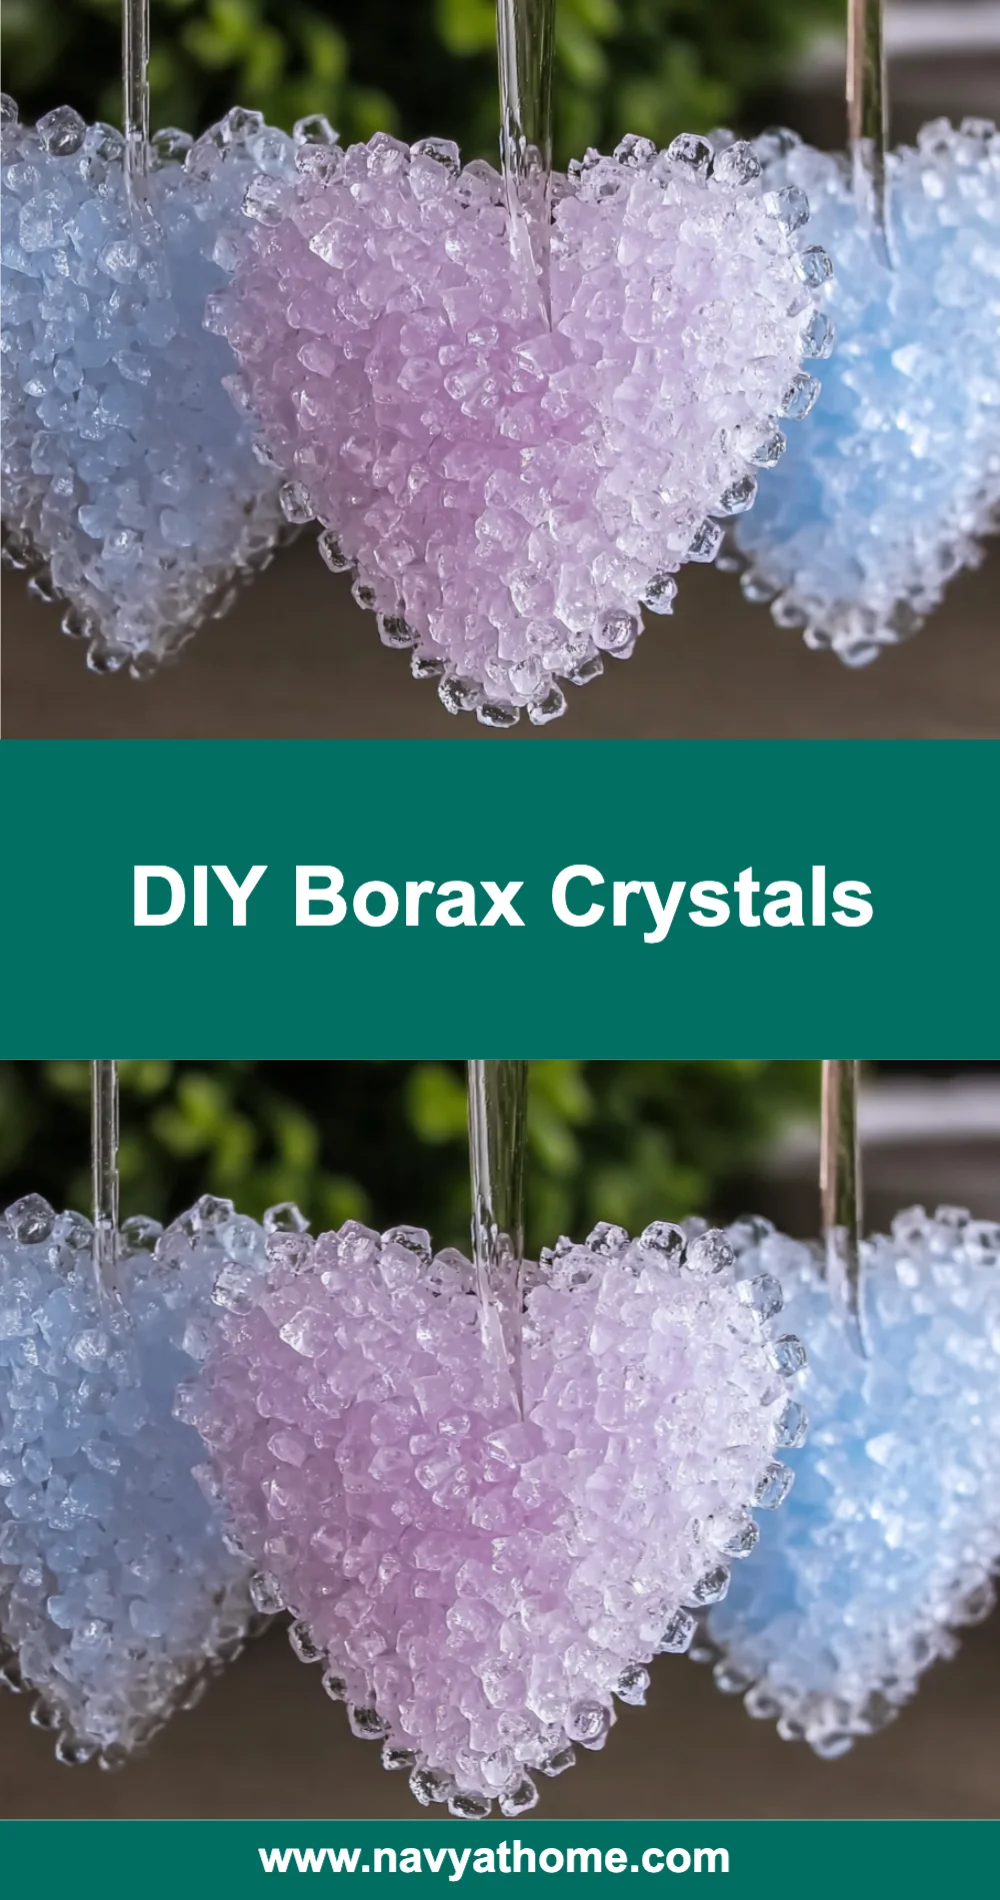
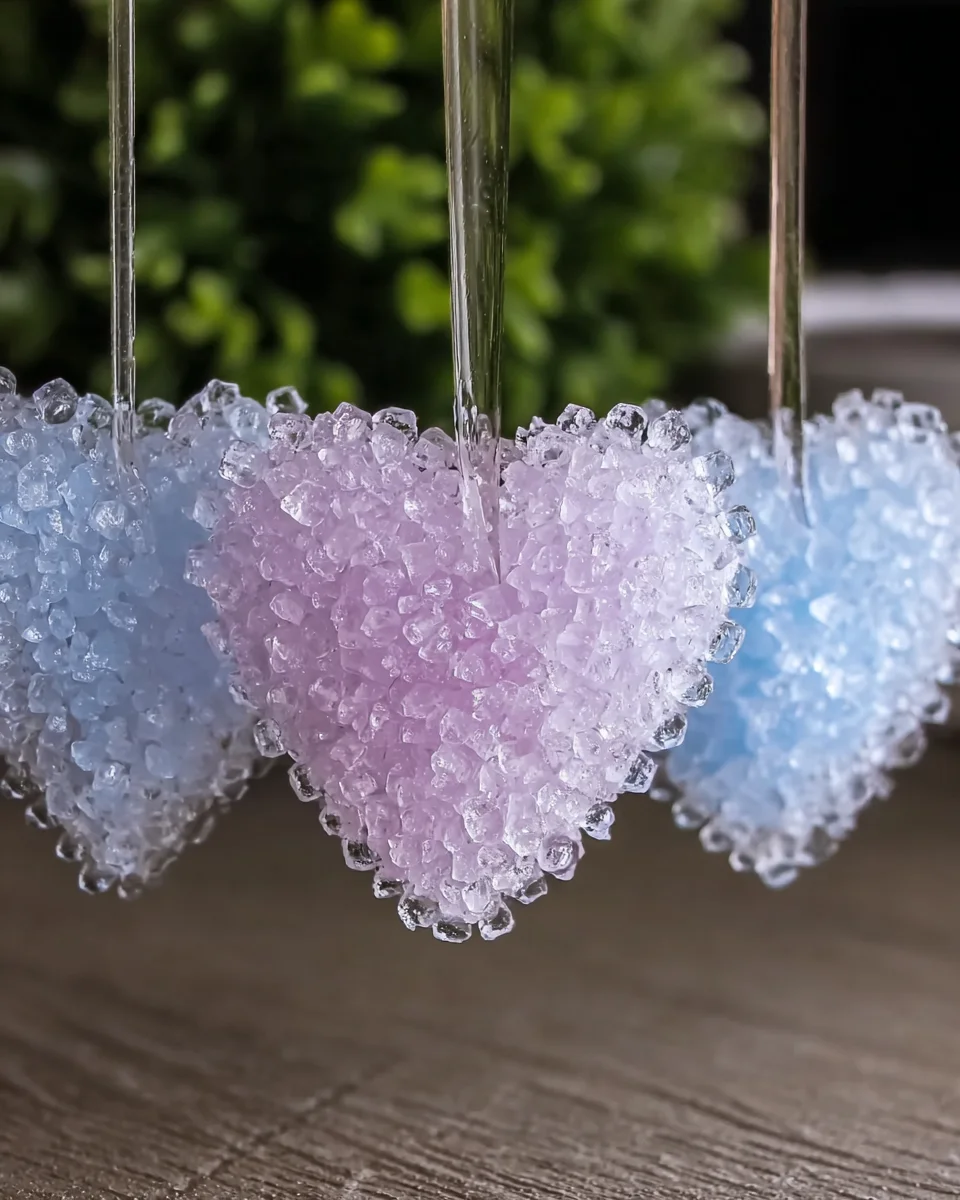
DIY Borax crystals are beautiful, sparkling creations that you can make at home with just a few simple ingredients. This hands-on project is perfect for science experiments, decorative pieces, or even as a unique gift. Anyone can make these enchanting crystals with minimal effort and time.
| Prep Time | 15 minutes |
|---|---|
| Cook Time | 24 hours |
| Total Time | 24 hours 15 minutes |
| Servings | 1 jar of crystals |
| Difficulty | Easy |
| Cuisine | Craft |
Why This Recipe Works
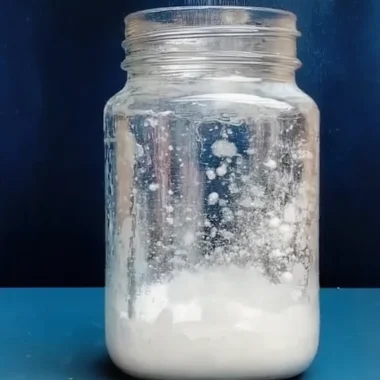
Making DIY Borax crystals is not only an engaging activity but also a fascinating lesson in crystallization. I’ve found that the simplicity of the ingredients allows even beginners to achieve great results. The combination of Borax and hot water creates a super-saturated solution, which is crucial for crystal formation.
In my experience, the quality and size of the crystals can be influenced by factors such as the temperature of the water and the purity of the Borax. The slower the cooling process, the larger and more defined the crystals become. This is why letting the jar sit undisturbed is vital.
Ingredients
| Ingredient | Quantity | Notes |
|---|---|---|
| Borax (sodium tetraborate) | 1 cup | Available at most grocery stores; ensure it’s pure. |
| Boiling water | 3 cups | Use freshly boiled water for best results. |
| Glass jar | 1 | A clean jar is essential for crystal growth. |
| String or stick | 1 | String works best for hanging crystals. |
| Pencil or chopstick | 1 | To suspend the string in the jar. |
| Food coloring | Optional | Add for colored crystals. |
Step-by-Step Instructions
-
Prepare the Solution:
In a heat-resistant container, carefully mix 1 cup of Borax into 3 cups of boiling water. Stir well until the Borax is fully dissolved.
-
Set Up the Crystallization:
Take your clean glass jar and tie one end of the string to the pencil or chopstick. The other end of the string should hang down into the jar without touching the bottom.
-
Add Color (Optional):
If you want colored crystals, add a few drops of food coloring to the Borax solution and stir gently.
-
Pour the Solution:
Carefully pour the Borax solution into the glass jar, ensuring the string hangs inside.
-
Let it Sit:
Place the jar in a location where it won’t be disturbed. Allow the jar to sit undisturbed for 24 hours.
-
Observe the Crystals:
After 24 hours, you should see crystals forming on the string and at the bottom of the jar.
-
Remove and Dry:
Carefully remove the string with the crystals and let them dry on a paper towel.
-
Store or Display:
Once dry, you can store your Borax crystals or display them as a decorative piece.
Chef Tips for Perfect Results
- Use distilled water for a purer crystal formation.
- Ensure your jar is completely clean to avoid impurities affecting crystal growth.
- Experiment with different temperatures; cooler environments can yield larger crystals.
- Try different types of food coloring to create unique crystal designs.
Common Mistakes to Avoid
- Using too much Borax can lead to a muddy solution. Stick to the 1 cup to 3 cups ratio.
- Not allowing the solution to cool undisturbed can prevent proper crystal formation.
- Touching or disturbing the crystals while they form can cause them to break apart.
- Using tap water with high mineral content can lead to cloudy crystals; distilled water is best.
Variations and Substitutions
| Ingredient | Substitution | Impact on Flavor |
|---|---|---|
| Food coloring | Natural dyes (like beet juice) | May create softer colors and unique hues. |
Serving Suggestions and Pairings
DIY Borax crystals make for stunning displays in homes or classrooms. Pair them with other science experiments, such as making homemade rock candy, to teach children about crystallization. They are also perfect for gifting during special occasions like birthdays or holidays.
Storage and Reheating
| Method | Duration | Instructions |
|---|---|---|
| Room temperature | Indefinitely | Store in a dry, cool place; avoid humidity. |
Nutritional Information
| Nutrient | Amount per Serving |
|---|---|
| Calories | N/A |
| Fat | N/A |
| Carbohydrates | N/A |
Frequently Asked Questions
Can I substitute Borax with other substances?
No, Borax is essential for this process. Other substances do not yield the same crystallization results.
How do I know when the crystals are done?
Crystals are ready to be removed when they are prominent and well-formed, usually after 24 hours.
What if my crystals are small or cloudy?
Small or cloudy crystals may result from impurities in the water or a disturbed solution. Ensure to use clean equipment and a stable environment.
Can I make these crystals ahead of time?
Yes, you can prepare the solution and let it sit for a few days to achieve larger crystals.
What should I do if the crystals don’t form?
If no crystals form, check the purity of your Borax and ensure the solution remains undisturbed for the entire crystallization period.
Making DIY Borax crystals is a fun and educational project that results in stunning decorative pieces. With simple ingredients and easy steps, you can create beautiful crystals that will amaze everyone. For more delicious recipes, check out French onion soup pasta or easy s’more bars for treats you will love!
DIY Borax Crystals
Ingredients
Equipment
Method
- Step 1: In a heat-resistant container, carefully mix 1 cup of Borax into 3 cups of boiling water. Stir well until the Borax is fully dissolved.
- Step 2: Take your clean glass jar and tie one end of the string to the pencil or chopstick. The other end of the string should hang down into the jar without touching the bottom.
- Step 3: If you want colored crystals, add a few drops of food coloring to the Borax solution and stir gently.
- Step 4: Carefully pour the Borax solution into the glass jar, ensuring the string hangs inside.
- Step 5: Place the jar in a location where it won't be disturbed. Allow the jar to sit undisturbed for 24 hours.
- Step 6: After 24 hours, you should see crystals forming on the string and at the bottom of the jar.
- Step 7: Carefully remove the string with the crystals and let them dry on a paper towel.
- Step 8: Once dry, you can store your Borax crystals or display them as a decorative piece.
Notes