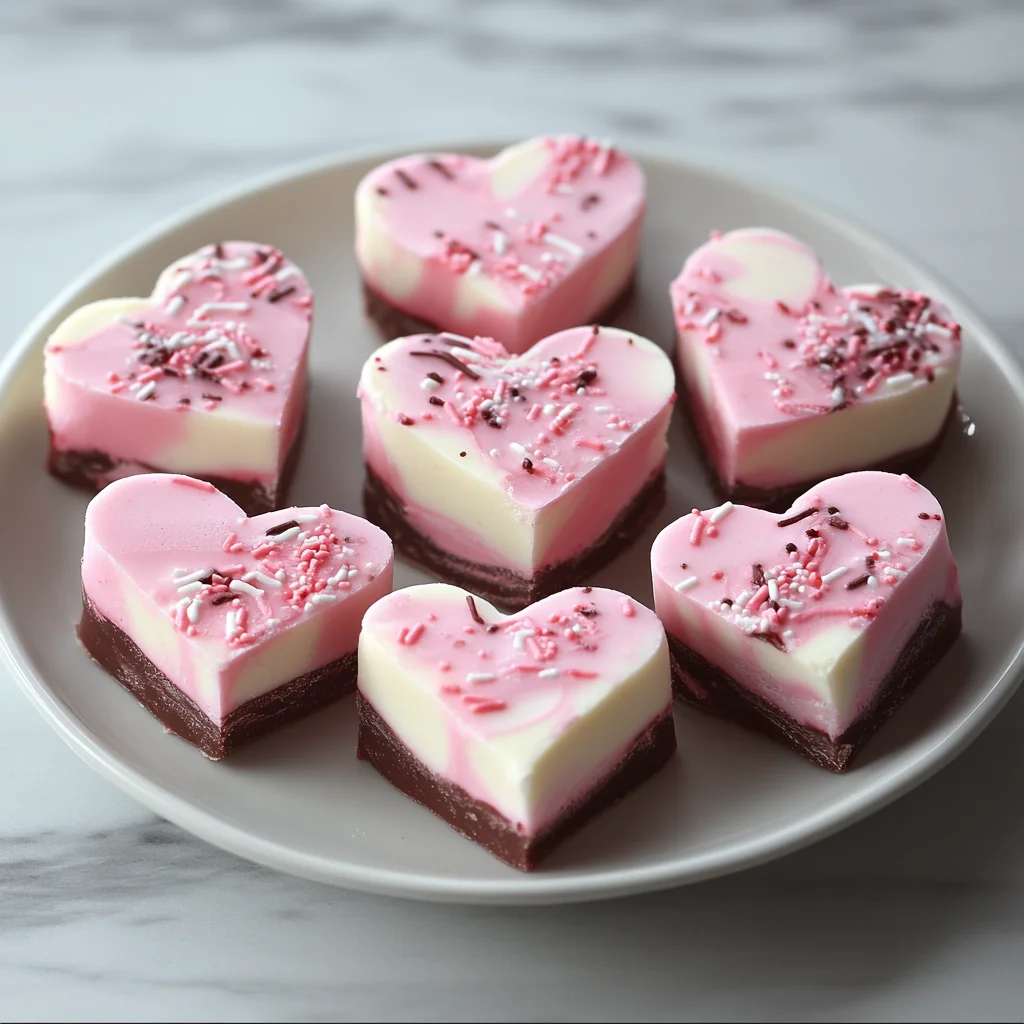
There’s something truly magical about the simple joy of sharing homemade sweets with someone you love. Maybe it’s the memories of childhood holidays, sneaking bits of fudge from the kitchen counter, or the warm feeling of gifting a little homemade love wrapped in pretty paper. Valentine Hearts Fudge is one of those classic treats that brings all those feelings together in one delicious, colorful bite. Whether you’re surprising your sweetheart, baking with your kids, or just enjoying a sweet moment for yourself, this fudge recipe is a quick, easy, and utterly memorable way to make Valentine’s Day (or any day!) special.
From the moment you melt that first layer of chocolate to swirling the soft pink layer on top, this recipe is hands-on and fun. And don’t worry if you’re new to fudge-making — I’ll walk you through every step, with tips that make it feel like you’re baking alongside a friend. Plus, the result is not only beautiful but perfectly giftable, making you look like a pro with minimal effort.
Why You’ll Love Valentine Hearts Fudge
- Fast: Ready in just a few simple steps and a couple of hours chilling time.
- Easy: No fancy candy thermometer or complicated techniques—just melt, mix, and swirl.
- Giftable: Beautiful heart-shaped pieces that look as good as they taste.
- Crowd-pleasing: Rich chocolate meets a creamy pink swirl — a perfect balance of flavors.
Ingredients
This recipe uses simple, everyday ingredients that you can find in most grocery stores. Here’s a quick rundown to help you gather everything before you start:
- Semi-sweet chocolate chips: These form the rich chocolate base of your fudge. I love using good-quality chips for a smooth, creamy texture.
- Sweetened condensed milk: This is the magic ingredient that gives fudge its signature creamy consistency without needing to boil sugar or monitor temperatures.
- Unsalted butter: Adds richness and helps the fudge set beautifully.
- Vanilla extract: Just a touch enhances the chocolate flavor and rounds out the sweetness.
- Salt: A pinch to balance the sweetness and deepen the chocolate notes.
- White chocolate chips: For the lovely pink swirl layer — these melt just as smoothly as the semi-sweet.
- Pink or red gel food coloring: A few drops create that festive Valentine’s pink without affecting flavor.
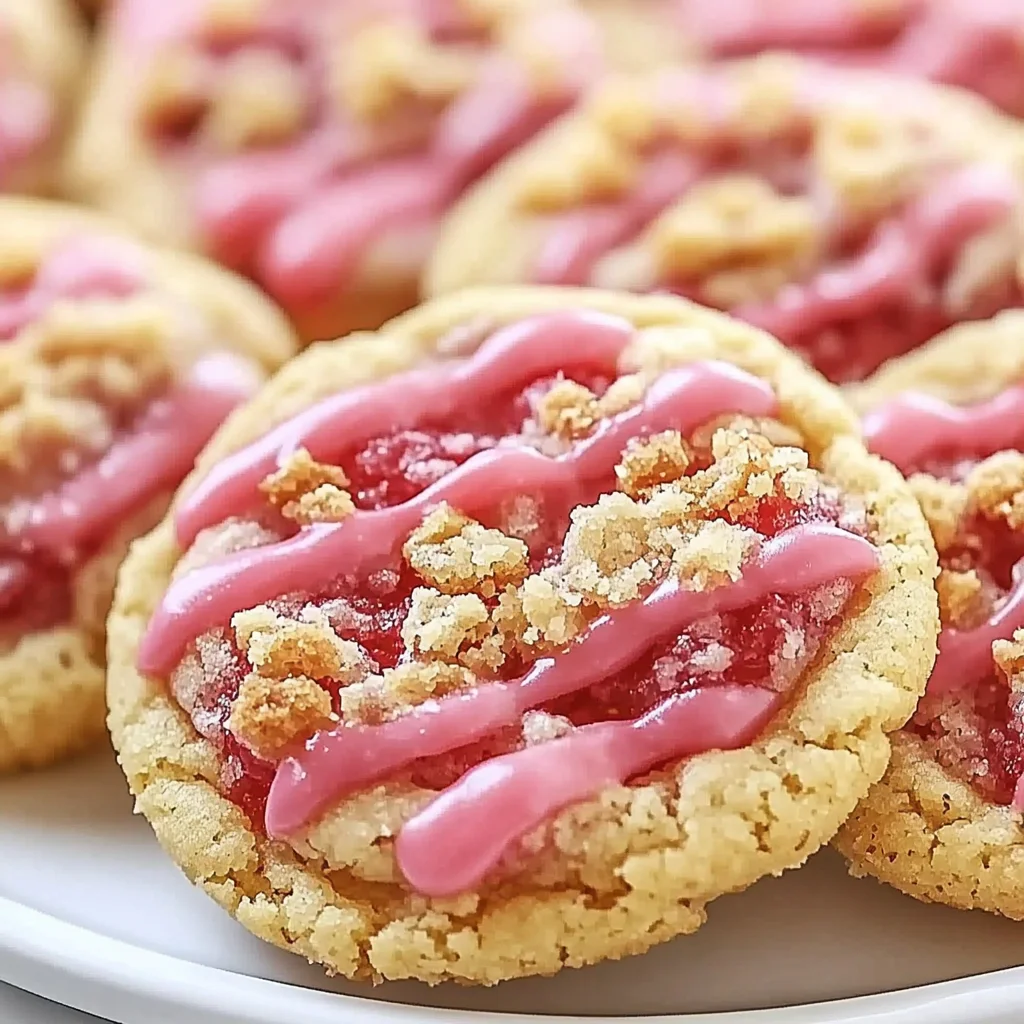
- Decorations: Crushed nuts, dried raspberries, cookie crumbs, heart sprinkles, or edible shimmer add texture and visual appeal.
If you like, you can get creative with your decorations to make each batch unique. I personally love sprinkling crushed dried raspberries on top for a little tartness and a pop of color.
How to Make Valentine Hearts Fudge
Now, let’s get into the fun part — making the fudge! Don’t worry if it feels a little messy at first; that’s part of the charm. Here’s the step-by-step guide:
- Prepare your pan: Line an 8×8-inch baking pan with parchment paper, leaving some overhang on the sides. This will make it super easy to lift the fudge out later. Lightly grease the parchment with butter or nonstick spray to prevent sticking.
- Melt the chocolate base: In a microwave-safe bowl, combine the semi-sweet chocolate chips, butter, and sweetened condensed milk. Microwave in 20-30 second bursts, stirring well after each interval until the mixture is silky smooth and fully melted. Stir in the vanilla extract and a pinch of salt for that perfect flavor balance.
- Spread the chocolate layer: Pour and spread the chocolate mixture evenly into the prepared pan using a spatula. Let it rest for a few minutes at room temperature while you prepare the pink swirl layer.
- Make the pink swirl layer: In a separate bowl, melt the white chocolate chips with the sweetened condensed milk, again using short microwave bursts. Stir until smooth, then add the vanilla extract and a couple of drops of pink or red gel food coloring. Mix until you achieve a lovely soft pink shade.
- Create the marbled effect: Spoon dollops of the pink fudge layer on top of the chocolate base. Using a skewer or toothpick, gently swirl the two layers together to create beautiful marbled patterns. This step is where your fudge gets its festive Valentine’s Day vibe!
- Add toppings: Sprinkle crushed nuts, dried raspberries, or cookie crumbs over the surface. For extra charm, add heart-shaped sprinkles or edible shimmer to make it sparkle.
- Chill: Place the pan in the refrigerator for at least 2 hours or until the fudge is completely firm.
- Cut and serve: Using the parchment overhang, lift the fudge out of the pan. Use a heart-shaped cookie cutter to cut individual pieces. Arrange them beautifully on a serving platter or package them up for gifting.
And there you have it — a batch of gorgeous, melt-in-your-mouth Valentine Hearts Fudge that’s sure to impress!
Substitutions & Additions
One of the best things about fudge is how customizable it is. Feel free to make this recipe your own with some easy swaps or creative add-ins:
- Chocolate chips: Don’t have semi-sweet? Use bittersweet or milk chocolate chips instead for a different flavor profile. Just keep the sweetness in mind when choosing.
- Sweetened condensed milk: If you want a dairy-free version, try sweetened condensed coconut milk, though the texture might be slightly different.
- Pink swirl layer: Substitute white chocolate chips with white almond bark for a smoother melt and firmer set.
- Food coloring: You can skip the coloring and use natural beet juice or freeze-dried raspberry powder for a lovely pink tint and subtle fruitiness.
- Decorations: Chopped pistachios, freeze-dried strawberry pieces, or even mini chocolate chips make great toppings. You could even add a sprinkle of sea salt for a trendy sweet-salty twist.
- Flavor boosts: Add a teaspoon of peppermint extract to the chocolate layer for a festive holiday spin, or a splash of almond extract to the pink layer for a nutty aroma.
If you love sweet treats with a bit of texture, I highly recommend trying the crushed cookie crumbs from your favorite shortbread or sugar cookies as a crunchy topping—it pairs beautifully with the creamy fudge.
Tips for Success
Making fudge can feel intimidating at first, but these tips will help you breeze through the process:
- Use quality chocolate: Good chocolate chips melt better and taste richer. I find that brands with at least 50% cocoa solids work well.
- Microwave carefully: Heat in short bursts and stir often to avoid burning the chocolate. It should be smooth and glossy, not grainy.
- Don’t skip the parchment paper: This makes removing the fudge from the pan so much easier and keeps your pieces neat.
- Swirl gently: When creating the marbled effect, don’t overmix or you’ll lose the pretty pattern.
- Chill completely: Make sure the fudge sets fully in the fridge before cutting, or it may crumble.
- Prep ahead: You can make this fudge up to a week in advance and store it in an airtight container in the fridge. It also freezes well if you want even longer storage.
One little trick I’ve learned is to warm your cookie cutter slightly before pressing into the fudge. This helps you get clean, perfect heart shapes without cracking the fudge edges.
How to Store Valentine Hearts Fudge
Proper storage is key to keeping your Valentine Hearts Fudge fresh and delicious:
- Room temperature: If your kitchen is cool, you can keep the fudge in an airtight container at room temperature for up to 3 days.
- Refrigerator: For longer freshness, store fudge in an airtight container in the fridge for up to 2 weeks. Be sure to let the fudge come to room temperature before serving for the best texture and flavor.
- Freezing: Wrap individual pieces tightly in plastic wrap, then place them in a freezer-safe bag or container. Freeze for up to 3 months. Thaw overnight in the fridge before enjoying.
Storing fudge properly means you can enjoy this treat well beyond Valentine’s Day, or keep it ready for last-minute gift-giving or sweet cravings.
FAQs
Q: Can I make this fudge without a microwave?
A: Absolutely! You can melt the chocolate and butter over a double boiler on the stove, stirring constantly until smooth. Just be careful not to let the bowl touch the water to avoid overheating.
Q: How do I prevent the fudge from being grainy?
A: The key is gentle melting. Stir often and avoid overheating the chocolate. Using good-quality chocolate also helps prevent graininess.
Q: Can I use regular food coloring instead of gel?
A: Gel food coloring works best because it doesn’t thin the white chocolate mixture. If you only have liquid food coloring, use it sparingly to avoid making the fudge too runny.
Q: What’s the best way to gift Valentine Hearts Fudge?
A: Package heart-shaped pieces in a pretty box or cellophane bags tied with ribbon. Adding a personal note makes it extra special. For inspiration, check out some creative gift ideas on WhizTips, where they share delightful treats and packaging tips perfect for holidays.
If you’re looking to keep the Valentine’s Day vibe going in your kitchen, why not try some other sweet recipes like the Strawberry Crunch Cookies or indulge in some rich, fudgy Red Velvet Brownies. These are all fantastic companions to your homemade fudge, perfect for sharing with friends and family.
Making Valentine Hearts Fudge is not just about the end result; it’s about the warmth and joy that comes from creating something with your own hands. I hope this recipe brings as much happiness to your kitchen as it has to mine!
Don’t forget to follow our Pinterest page for more cozy recipes and inspiring kitchen ideas.
Valentine Hearts Fudge
Ingredients
Equipment
Method
- Step 1: Line an 8×8-inch baking pan with parchment paper, leaving overhang on sides. Lightly grease parchment with butter or nonstick spray to prevent sticking.
- Step 2: In a microwave-safe bowl, combine semi-sweet chocolate chips, butter, and sweetened condensed milk. Microwave in 20-30 second bursts, stirring well after each, until smooth and melted. Stir in vanilla extract and a pinch of salt.
- Step 3: Pour and spread chocolate mixture evenly into prepared pan. Let rest a few minutes at room temperature.
- Step 4: In a separate bowl, melt white chocolate chips with sweetened condensed milk using short microwave bursts. Stir until smooth. Add vanilla extract and pink or red gel food coloring. Mix to a soft pink color.
- Step 5: Spoon dollops of the pink fudge layer over the chocolate base. Using a skewer or toothpick, gently swirl the layers together to create a marbled pattern.
- Step 6: Sprinkle crushed nuts, dried raspberries, cookie crumbs, heart sprinkles, or edible shimmer over the top if desired.
- Step 7: Refrigerate for at least 2 hours or until completely firm.
- Step 8: Lift fudge out of pan using parchment overhang. Use a heart-shaped cookie cutter to cut individual pieces. Arrange on platter or package for gifting.