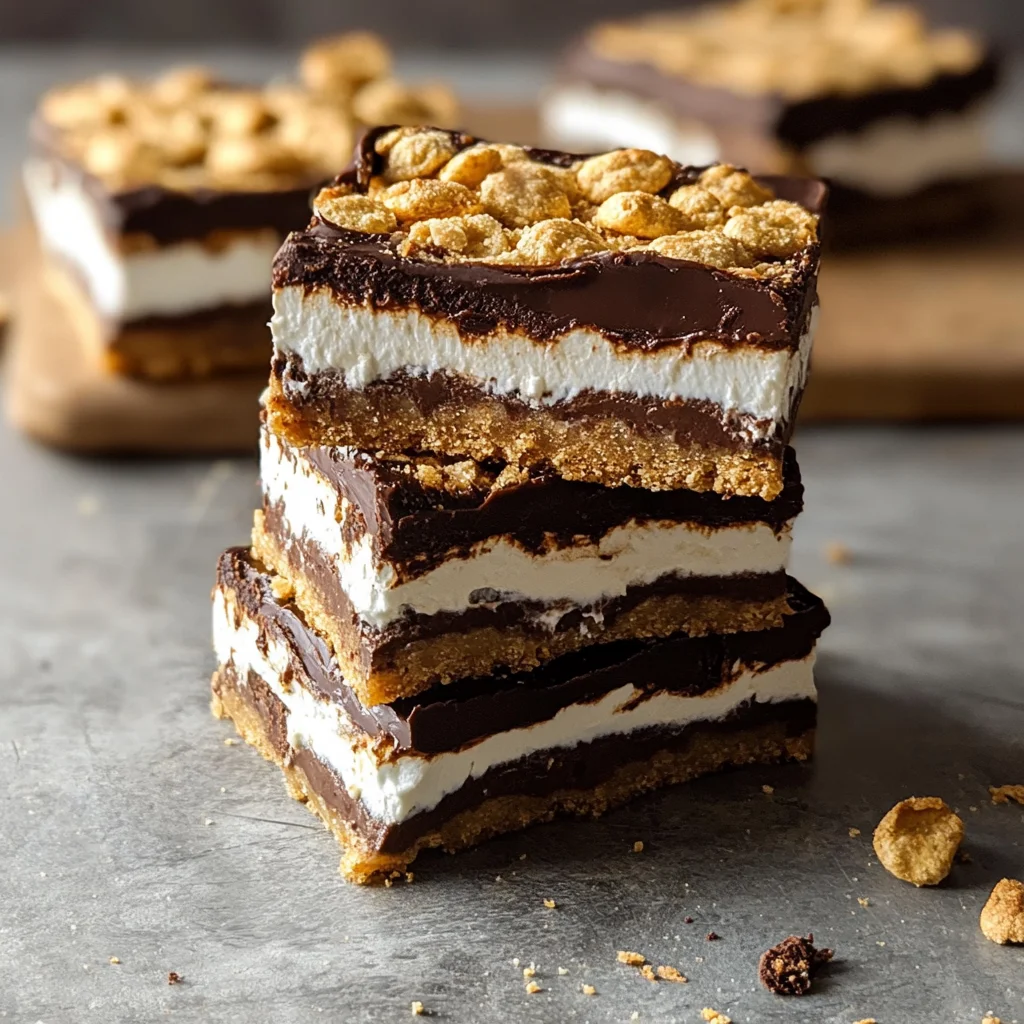
There’s something truly magical about the smell of toasted marshmallows and melted chocolate wafting through the air, isn’t there? Maybe it reminds you of summer campfires, late-night stories under the stars, or cozy family nights gathered around the fireplace. But what if you could capture all those warm, nostalgic flavors in a simple treat you can whip up in your own kitchen anytime? That’s exactly what these Easy S’more Bars bring to your table—a gooey, chocolatey, crunchy delight that’s perfect for sharing or just indulging in your sweet tooth solo. And the best part? They’re incredibly quick and easy to make, no campfire required!
Why You’ll Love Easy S’more Bars – Decadent Chocolate Graham Treat
- Fast: Ready in under 30 minutes, these bars are perfect for last-minute cravings or impromptu gatherings.
- Easy: Minimal ingredients and simple steps make this a great beginner-friendly recipe.
- Giftable: Slice them into squares, wrap them up nicely, and you’ve got a thoughtful, homemade treat to share.
- Crowd-pleasing: Who doesn’t love the classic combo of chocolate, marshmallow, and graham cracker in a convenient bar form?
Ingredients
Let’s talk about the stars of the show! This recipe keeps things straightforward with a handful of pantry staples that you might already have on hand.
- 2 cups graham cracker crumbs: This forms the crunchy, buttery base that mimics the classic s’more’s graham cracker. You can crush whole crackers yourself or buy pre-crumbled.
- 1/2 cup melted butter: Butter binds the crumbs together and adds richness to the crust.
- 4 cups chocolate chips: Use semi-sweet or milk chocolate chips depending on your sweetness preference. I love using a mix sometimes for extra depth.
- 1 package mini marshmallows: These are what give you that signature gooey, toasted marshmallow top—pure magic!
- 1/4 teaspoon salt (optional): Just a pinch of salt can balance the sweetness perfectly, but feel free to skip if you prefer.
How to Make Easy S’more Bars – Decadent Chocolate Graham Treat
Now, let me walk you through the process. Don’t worry—it’s as fun as it is tasty.
- Preheat your oven to 350°F (175°C). This is the perfect temperature to melt your chocolate just right and get those marshmallows golden without burning.
- Mix your graham cracker crumbs and melted butter. In a large bowl, stir them together until every crumb is coated in butter. This step is key to getting a firm, buttery crust that holds together when sliced.
- Press the crumb mixture into a 9×13 inch baking pan. Use the back of a spoon or your fingers to firmly press it down into an even layer. This will be the sturdy base of your bars.
- Sprinkle chocolate chips evenly over the crust. Don’t be shy—this is the chocolatey heart of the bar!
- Bake for 5-7 minutes. This short baking time softens the chocolate chips so they’re easy to spread but not fully melted.
- Carefully remove the pan and spread the softened chocolate. Use a spatula to smooth out the chocolate layer evenly over the crust. This makes sure every bite has that luscious chocolate goodness.
- Evenly sprinkle mini marshmallows over the chocolate. Cover the entire surface so that every square gets a nice toasty topping.
- Return the pan to the oven for 8-12 minutes. Watch closely as the marshmallows puff up and turn golden brown. This is the moment when the magic happens!
- Remove from oven and let cool completely on a wire rack. It’s tempting to dig in right away, but letting them set for 1-2 hours helps the bars firm up for easier slicing.
- Slice into bars using a sharp knife. For clean edges, dip your knife in hot water and dry it before each cut. This little trick keeps the marshmallow from sticking and gives you pretty squares.
And voilà! You have the perfect batch of s’more bars ready to impress your family, friends, or just satisfy your own sweet tooth. If you love desserts that come together quickly but taste like you’ve spent hours in the kitchen, this recipe is a winner.
Substitutions & Additions
If you’re feeling creative or want to tweak this recipe to suit your cravings, there are plenty of fun ways to mix it up!
- Chocolate variations: Swap out the chocolate chips for white chocolate or dark chocolate chunks. You can even mix in peanut butter chips or butterscotch for a new flavor dimension.
- Nutty crunch: Sprinkle chopped nuts like pecans, almonds, or walnuts on top of the marshmallows before the final bake for extra texture and a nutty note.
- Flavored crust: Add a dash of cinnamon or a teaspoon of vanilla extract to the graham cracker crust for an aromatic twist.
- Marshmallow alternatives: If mini marshmallows aren’t your thing, try using large marshmallows cut in half or even marshmallow fluff spread thinly over the chocolate layer before baking.
- Make it gluten-free: Use gluten-free graham cracker crumbs to make this treat safe for gluten-sensitive friends.
- Berry boost: For a surprising fruity finish, add fresh or freeze-dried strawberries or raspberries on top after baking, pairing well with the chocolate’s richness.
For more fun dessert ideas that bring a cozy vibe to your kitchen, you might also enjoy trying the Strawberry Crunch Cookies or the wonderfully comforting Pineapple Upside Down Sugar Cookies. Both are simple to make and sure to delight your taste buds!
Tips for Success
As someone who’s made these bars countless times, I’ve learned a few tricks that really help get the best results.
- Firm crust: Don’t skimp on pressing the graham cracker mixture firmly into the pan. This helps the bars hold together better when slicing and serving.
- Watch the marshmallows: Marshmallows can go from perfectly toasted to burnt in seconds, so keep a close eye during the final bake.
- Cooling is key: Patience here pays off big time. Let the bars cool fully and set before cutting to avoid gooey messes.
- Clean cuts: Wiping your knife with a hot, damp cloth between slices keeps the marshmallow from sticking and gives you neat squares.
- Prep-ahead: You can prepare the crust and chocolate layer a day ahead, then add marshmallows and bake just before serving. This saves time and keeps the marshmallows fresh and fluffy.
- Experiment with pans: If you don’t have a 9×13 pan, an 8×8 will work but your bars will be thicker and may need a bit more baking time.
How to Store Easy S’more Bars – Decadent Chocolate Graham Treat
These bars are perfect for making ahead and sharing, but storage is important to keep them tasting fresh and gooey.
- Room temperature: Store in an airtight container at room temperature for up to 2 days. They’re best enjoyed within this time for that perfect marshmallow softness.
- Refrigeration: If you want to keep them longer, refrigerate in an airtight container for up to 5 days. Just know the marshmallows may firm up a bit.
- Freezing: Wrap bars individually in plastic wrap and place in a freezer-safe container or bag. Freeze for up to 2 months. Thaw at room temperature before serving.
- Reheating: To revive the gooey texture after chilling or freezing, pop a bar in the microwave for 10-15 seconds. Be careful not to melt it too much!
With these storage tips, you can enjoy your homemade s’more bars anytime you want a little chocolatey comfort.
FAQs
Can I use regular marshmallows instead of mini ones?
Absolutely! Just slice regular marshmallows into smaller pieces or halves so they cover the surface evenly and toast nicely.
What if I don’t have graham crackers?
You can substitute digestive biscuits or even crushed vanilla wafers for the crust. The flavor will be a little different but still delicious.
Can I make these bars vegan?
Yes! Use dairy-free butter and dairy-free chocolate chips, and check that the marshmallows are vegan (some brands offer vegan versions). Your bars will still be scrumptious.
How do I prevent the bars from sticking to the pan?
Line your baking pan with parchment paper, leaving some overhang on the sides. This makes lifting the bars out after cooling super easy.
If you love exploring recipes that transform simple ingredients into comforting dishes, be sure to check out the Easy Flavorful Chicken Ramen—it’s a bowl of cozy goodness perfect for chilly days!
Thanks for spending time with me in the kitchen! If you try these Easy S’more Bars, I’d love to hear how they turned out for you. There’s just something so satisfying about baking a treat that brings back childhood memories while filling your home with sweet aromas.
Don’t forget to follow our Pinterest page for more delicious recipes and kitchen inspiration!