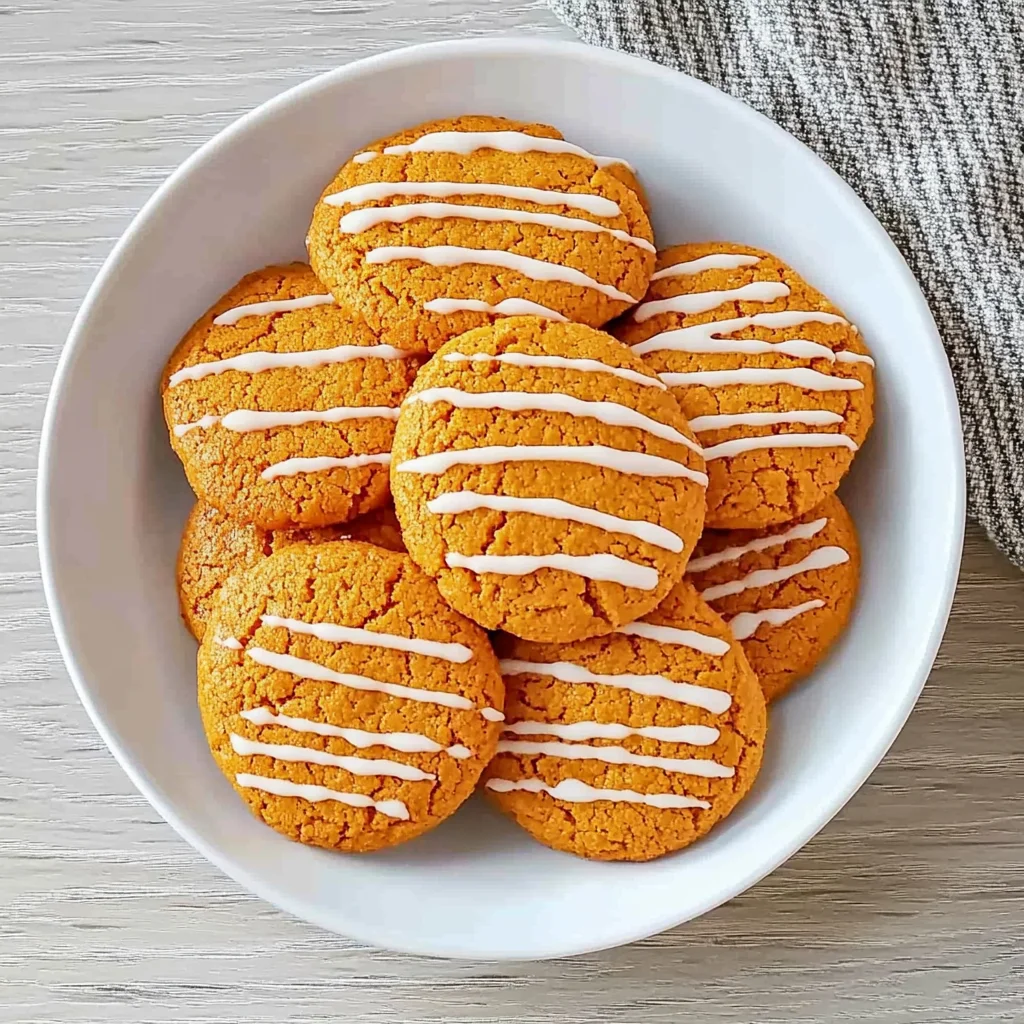

There’s something truly magical about cream cheese cookies that just takes me right back to cozy afternoons spent in my grandma’s kitchen. The way those soft, buttery cookies melt in your mouth, paired with a sweet, creamy frosting—it’s a nostalgic hug in cookie form. If you’re looking for a treat that’s both easy to make and absolutely memorable, you’re in the right place. These cream cheese cookies are quick to whip up, wonderfully versatile, and perfect for sharing with family and friends or gifting during the holidays.
I love how simple ingredients come together to create such a tender, flavorful cookie that can be dressed up with colorful frosting or kept plain for a more understated delight. Plus, using a cookie press adds a little fun and flair to the whole baking process. Whether you’re an experienced baker or a kitchen newbie, these cookies will become one of your go-to recipes for a sweet, satisfying treat.
Why You’ll Love Cream Cheese Cookies
- Fast: From mixing to baking, these cookies come together in under 30 minutes, making them perfect for last-minute baking sessions.
- Easy: No complicated steps or fancy equipment needed—just a cookie press and basic ingredients you probably already have.
- Giftable: Frosted and decorated, these cookies make a beautiful and heartfelt gift for friends, neighbors, or coworkers.
- Crowd-pleasing: Their soft texture and rich flavor appeal to kids and adults alike, making them a guaranteed hit at parties or family gatherings.
Ingredients
Let’s take a closer look at what you’ll need for these delightful cookies. Each ingredient plays an important role in creating that perfect balance of softness, flavor, and sweetness:
- Butter (½ lb / 225 g, softened): The base of the dough, butter adds richness and helps achieve that tender texture.
- Cream cheese (4 oz / 115 g, softened): This gives the cookies a subtle tang and incredible softness that sets them apart from standard butter cookies.
- Granulated sugar (½ cup / 100 g): Sweetens the dough without overpowering the delicate cream cheese flavor.
- All-purpose flour (2 cups / 240 g): Provides structure, but not so much that the cookies become dry or tough.
- Vanilla extract (1 tsp): Adds a warm, aromatic sweetness that complements the cream cheese beautifully.
- Food coloring (optional): If you want to add a pop of color to your cookies for holidays or themed events, this is your chance to get creative!
For the frosting, you’ll need:
- Butter (3 tbsp / 45 g, softened): Makes the frosting creamy and spreadable.
- Powdered sugar (1½ cups / 180 g): Sweetens and thickens the frosting to a perfect consistency.
- Milk (1–2 tbsp): Adjusts the frosting’s texture so it’s smooth and easy to spread.
- Food coloring (optional): To match or contrast with your cookie dough colors for a festive look.
How to Make Cream Cheese Cookies
Now, let’s walk through the steps together. Don’t worry—this recipe is straightforward and fun, especially when you get to use the cookie press. Here’s how I like to do it:
- Beat the butter and cream cheese: Start by beating the softened butter and cream cheese together until the mixture is light and fluffy. This usually takes about 2-3 minutes with an electric mixer. The fluffiness here is key—it helps give your cookies that soft, melt-in-your-mouth texture.
- Add sugar and vanilla: Mix in the granulated sugar and vanilla extract until everything looks creamy and smooth. You’ll notice the dough starts to come together nicely now.
- Incorporate the flour: Gradually add the all-purpose flour and mix just until a soft dough forms. Don’t overmix here; you want the dough just combined to keep the cookies tender. If you want to add food coloring, this is the time to knead it gently into the dough.
- Chill the dough: Pop your dough in the refrigerator for about 10 minutes. This helps it firm up a bit, making it easier to work with your cookie press.
- Preheat and prepare: Preheat your oven to 400°F (200°C). Use cool, ungreased baking sheets—this helps the cookies bake evenly and keeps their pretty shapes.
- Press your cookies: Load the dough into your cookie press and press your favorite shapes onto the baking sheets. This is such a fun step because you can get creative with different designs depending on the cookie press disks you have.
- Bake: Bake the cookies for 4–6 minutes, just until the bottoms turn a light golden color. These cookies bake quickly, so keep a close eye on them—you want soft cookies, not crispy.
- Cool: Transfer the cookies to a wire rack to cool completely before frosting. This step is crucial because warm cookies will melt the frosting and make a mess.
- Make the frosting: While your cookies cool, beat together the softened butter, powdered sugar, and milk until you get a smooth, spreadable frosting. Add food coloring if you like to brighten things up.
- Frost and decorate: Spread the frosting on each completely cooled cookie. This is your chance to get creative—sprinkles, edible glitter, or even a drizzle of chocolate can take these cookies from simple to spectacular.
These cookies are perfect for a quick dessert fix, but if you want to explore more cozy baked treats, you might enjoy checking out recipes like the Easy S’more Bars or the soft and fruity Strawberry Crunch Cookies for your next baking adventure.
Substitutions & Additions
One of the best things about this recipe is how flexible it is. Here are some swaps and creative ideas to make these cookies your own:
- Butter alternatives: You can substitute half the butter with margarine or a plant-based butter to make the recipe dairy-friendly, though the creaminess might be a bit different.
- Flour variations: For a slightly different texture, try using half all-purpose and half cake flour, which will make cookies even more tender and delicate.
- Flavor twists: Add a pinch of cinnamon, lemon zest, or almond extract to the dough for a unique flavor profile.
- Frosting upgrades: Mix in a little cream cheese to the frosting for an ultra-rich topping, or add cocoa powder for chocolate frosting.
- Decorations: Sprinkle chopped nuts, colored sugar, or mini chocolate chips on the frosting before it sets to add some texture and sparkle.
If you want to try a tangy and creamy twist, you might be interested in the luscious Strawberry Cheesecake Cinnabon Rolls, which also feature a dreamy cream cheese frosting that perfectly complements the sweet dough.
Tips for Success
From my experience baking these cookies (and trust me, I’ve made plenty of batches!), here are some tips to help you nail the recipe every time:
- Don’t skip chilling: Even though it’s just for 10 minutes, chilling the dough is essential. It makes the dough easier to handle and helps the cookies keep their shape during baking.
- Use softened butter and cream cheese: If they’re too cold, your dough will be lumpy and hard to mix. Let them sit at room temperature for about 30 minutes before starting.
- Watch your baking time: These cookies bake quickly. Check them at 4 minutes and remove them as soon as the bottoms start to turn golden. Overbaking will make them dry and lose that signature softness.
- Cookie press care: If your dough feels sticky, lightly flour your hands or the cookie press disk to prevent sticking.
- Cool completely before frosting: Warm cookies will melt your frosting and create a messy, runny situation.
- Prep ahead: You can make the dough a day ahead and keep it wrapped in the fridge. Just bring it back to room temperature for a few minutes before pressing the cookies.
How to Store Cream Cheese Cookies
Once you’ve baked and frosted your cookies, storing them properly will keep them fresh and delicious for days:
- Room temperature: Store the cookies in an airtight container at room temperature for up to 3 days. Place a sheet of parchment paper between layers to prevent sticking.
- Refrigeration: If your kitchen is warm or you’ve used a cream cheese frosting, it’s best to keep the cookies refrigerated. They’ll last about 5 days this way. Just bring them to room temperature before serving for the best flavor.
- Freezing: You can freeze unfrosted cookies for up to 3 months. Thaw them at room temperature and frost after they’ve fully thawed. Alternatively, freeze frosted cookies on a baking sheet, then transfer to a container once frozen solid.
FAQs
Can I make these cookies without a cookie press?
Absolutely! If you don’t have a cookie press, you can roll the dough into small balls and gently flatten them with the bottom of a glass or your palm. The texture and flavor will be just as delicious.
Can I use low-fat cream cheese or butter?
For best results, use full-fat cream cheese and butter. Low-fat versions might alter the texture and richness of the cookies, making them less tender and flavorful.
How do I prevent the frosting from getting too runny?
Start with 1 tablespoon of milk and add more only if needed. The frosting should be spreadable but thick enough to hold its shape. If it gets too thin, add a bit more powdered sugar to thicken it back up.
Can I add mix-ins like chocolate chips or nuts to the dough?
Yes! Adding mini chocolate chips, chopped nuts, or dried fruit can be a great way to customize your cookies. Just fold them into the dough gently after mixing in the flour.
If you love recipes that bring a warm, comforting vibe to your kitchen, be sure to explore more delightful dishes on Navy at Home. Whether you want to try a comforting French Onion Soup Pasta or a fun, spicy snack like Voodoo Egg Rolls, there’s always something cozy and delicious waiting for you to try.
Ready to bring some sweetness and smiles to your kitchen? Grab your ingredients and start baking these irresistible cream cheese cookies today. Your friends and family will thank you!
Don’t forget to follow us on Pinterest for more tasty recipes, baking tips, and kitchen inspiration!
The Ultimate Cream Cheese Cookies
Ingredients
Equipment
Method
- Step 1: Beat the softened butter and cream cheese together until light and fluffy, about 2-3 minutes with an electric mixer.
- Step 2: Mix in the granulated sugar and vanilla extract until the mixture is creamy and smooth.
- Step 3: Gradually add the all-purpose flour and mix just until a soft dough forms. If using food coloring, knead it gently into the dough now.
- Step 4: Chill the dough in the refrigerator for about 10 minutes to firm up for easier pressing.
- Step 5: Preheat the oven to 400°F (200°C). Use cool, ungreased baking sheets for best results.
- Step 6: Load dough into a cookie press and press desired shapes onto the baking sheets.
- Step 7: Bake cookies for 4-6 minutes, until the bottoms just turn a light golden color. Watch closely to avoid overbaking.
- Step 8: Transfer cookies to a wire rack to cool completely before frosting.
- Step 9: While cookies cool, beat together softened butter, powdered sugar, and milk until smooth and spreadable. Add food coloring if desired.
- Step 10: Frost each cooled cookie and decorate as you like with sprinkles, edible glitter, or drizzled chocolate.