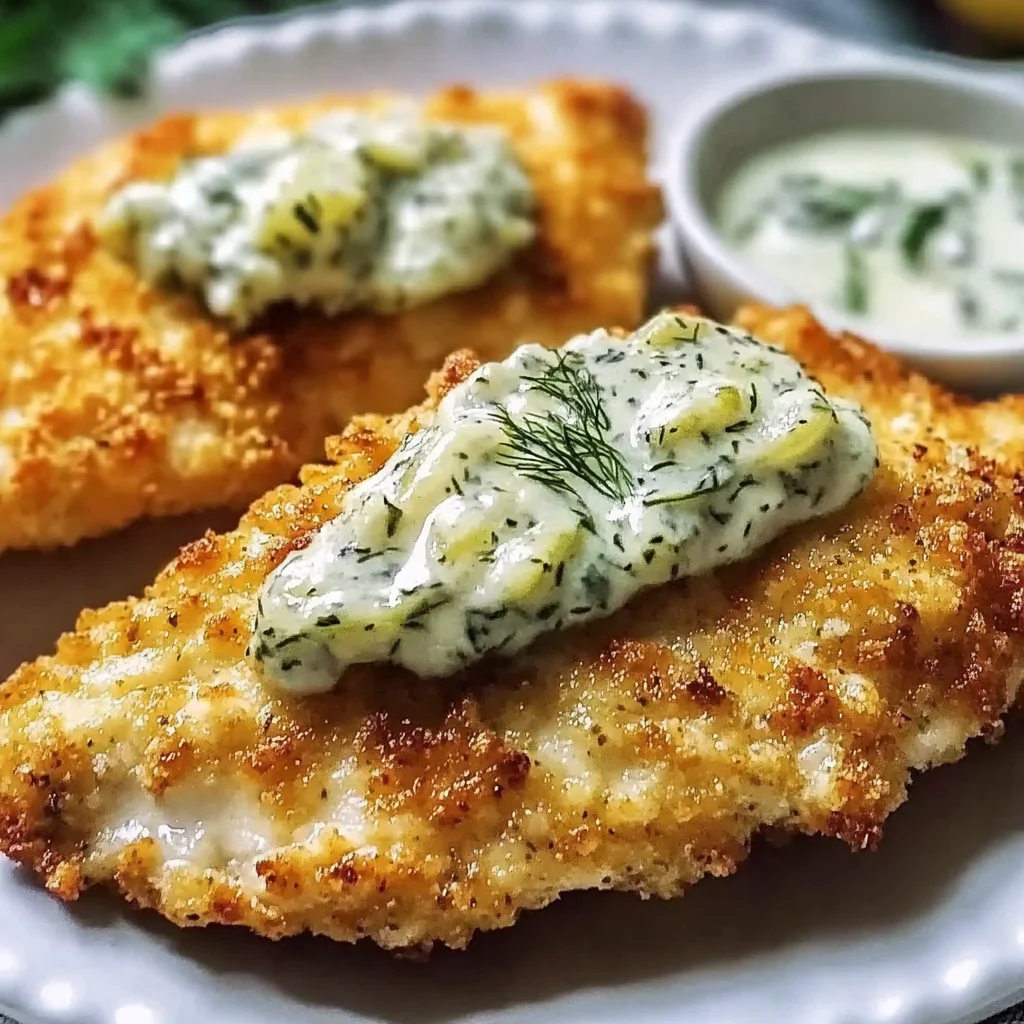
There’s something truly nostalgic about the smell of fried chicken sizzling in a pan—warm, inviting, and promising a satisfying crunch with every bite. But what if I told you that you could take that classic comfort food and give it a tangy, irresistible twist with dill pickles and Parmesan cheese? That’s exactly what this Crispy Dill Pickle Parmesan Chicken recipe brings to your table: a perfect harmony of zesty pickle juice marinade, crunchy Parmesan coating, and juicy chicken inside. It’s quick enough for a weeknight dinner and special enough to impress guests without breaking a sweat.
Whether you’re craving a new spin on fried chicken or looking for a recipe that’s both simple and unforgettable, this dish will quickly become one of your favorites. Let me walk you through why this recipe is a keeper, how to make it step-by-step, and share some handy tips to make it foolproof every time.
Why You’ll Love Crispy Dill Pickle Parmesan Chicken
- Fast: With just a short marinade and quick frying, this meal comes together in under an hour.
- Easy: Simple pantry staples and straightforward steps make it beginner-friendly.
- Giftable: Perfect for potlucks or bringing to a friend’s house, it’s a crowd-pleaser that travels well.
- Crowd-pleasing: The crispy crust and tangy flavor profile win over both kids and adults alike.
Ingredients
Before you start, let’s take a look at the ingredients you’ll need. Each one plays a key role in building layers of flavor and texture.
- 4 boneless, skinless chicken breasts: The star of the dish, tender and juicy after marinating.
- 1 cup dill pickle juice: This adds a bright, tangy kick that tenderizes and flavors the chicken beautifully.
- 1 cup seasoned breadcrumbs: Provides a flavorful, crunchy coating; seasoned ones save time and amp up taste.
- 1/2 cup grated Parmesan cheese: Adds a nutty, savory depth and extra crispiness when fried.
- 1/2 cup all-purpose flour: Helps the coating stick and creates a light crust.
- 2 large eggs, whisked: Acts as the glue for the breading layers.
- 1 tsp garlic powder & 1 tsp onion powder: These aromatic spices add a subtle savory punch.
- 1/2 tsp paprika: Adds warmth and a hint of smokiness to the coating.
- Salt and pepper: Essential for seasoning both the chicken and the breading.
- Cooking oil: For frying; use a neutral oil like vegetable or canola for best results.
How to Make Crispy Dill Pickle Parmesan Chicken
Let’s get you cooking this delicious dish step-by-step. I’ll share some personal tips to ensure your chicken comes out perfectly crispy and flavorful every time.
Step 1: Marinate the Chicken
Start by placing your chicken breasts in a shallow dish or a zip-top bag. Pour the dill pickle juice over the chicken, making sure each piece is well-coated. This marinade is where the magic begins—it tenderizes the meat while infusing it with that unmistakable tangy flavor. Pop it into the fridge for at least 30 minutes, but if you have the time, 1 to 2 hours is even better. I’ve found that this extra time really helps the flavor sink in deeply without turning the chicken mushy.
Step 2: Prepare Your Breading Stations
While the chicken marinates, set up three shallow dishes for your breading process:
- Dish 1: Mix the flour with garlic powder, onion powder, paprika, salt, and pepper. This seasoned flour base adds flavor right from the start.
- Dish 2: Whisk the eggs until smooth. This will help the coating stick firmly to the chicken.
- Dish 3: Combine the Parmesan cheese with the seasoned breadcrumbs. The Parmesan not only adds great flavor but also helps create that irresistible golden crust.
Setting up your breading station like this makes the process smooth and mess-free—trust me, it’s a game-changer when you’re cooking for a crowd.
Step 3: Coat the Chicken
Remove the chicken from the marinade and pat each piece dry with paper towels. This is a crucial step—too much moisture and your coating will slide right off. First, dredge each breast in the seasoned flour, making sure to cover all sides. Next, dip it into the whisked eggs, and then press it firmly into the Parmesan-breadcrumb mixture. I like to press the coating in with my hands to ensure every nook and cranny is covered. This triple-layer breading creates that signature crunch.
Step 4: Fry to Golden Perfection
Heat about 1/2 inch of cooking oil in a large skillet over medium-high heat. Test the oil by dropping a pinch of breadcrumb in—it should sizzle immediately. Carefully lay the chicken pieces into the hot oil, making sure not to overcrowd the pan. Fry for 5 to 7 minutes per side, turning gently, until the crust is a gorgeous golden brown and the chicken reaches an internal temperature of 165°F. If you don’t have a thermometer, cut into one piece to check that the juices run clear.
Once cooked, transfer the chicken to a wire rack to drain any excess oil. Let it rest for a few minutes before serving—this helps the juices redistribute and keeps the chicken moist inside.
Substitutions & Additions
Feel free to get creative or adjust this recipe based on what you have on hand or your flavor preferences!
- Chicken thighs instead of breasts: For even juicier, more flavorful meat, boneless thighs work wonderfully.
- Swap seasoned breadcrumbs for panko: For an extra crispy crunch, use panko breadcrumbs mixed with Parmesan.
- Add fresh herbs: Mix chopped fresh dill or parsley into the breadcrumb mixture for a fresh, herbal note.
- Spice it up: Add cayenne pepper or smoked paprika for a kick of heat in the breading.
- Oven-bake instead of frying: If you want a lighter version, bake the coated chicken on a wire rack at 425°F for 20-25 minutes, flipping halfway through.
If you love comfort food with a twist like this, you might also enjoy the creamy flavors in my Creamy Ground Beef Potato Casserole—another cozy, crowd-pleasing favorite in my kitchen.
Tips for Success
Here are some of my best tips to make sure your Crispy Dill Pickle Parmesan Chicken turns out perfect every time:
- Don’t skip the drying step: Patting the chicken dry after marinating is key to getting a crispy, crunchy crust.
- Use a wire rack after frying: This prevents sogginess by letting excess oil drip away instead of pooling under the chicken.
- Monitor oil temperature: Too hot and the crust burns before the chicken cooks through; too cool and it absorbs too much oil and becomes greasy.
- Marinate ahead: You can marinate the chicken up to 2 hours ahead of time to save time when you’re ready to cook.
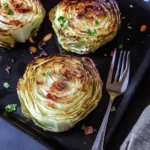
- Make it a meal: Serve with a fresh salad or crispy roasted veggies like my Crispy Roasted Cabbage Steaks for a balanced, flavorful dinner.
How to Store Crispy Dill Pickle Parmesan Chicken
If you happen to have leftovers (which is rare because it’s so irresistible!), here’s how to keep them tasty:
- Refrigerate: Place leftover chicken in an airtight container and store in the fridge for up to 3 days.
- Reheat: For best results, reheat in a 375°F oven on a wire rack for about 10 minutes to crisp up the coating again. Avoid microwaving if you want to keep the crust crunchy.
- Freeze: You can freeze cooked chicken for up to 2 months. Wrap each piece tightly in foil or plastic wrap, then place in a freezer bag. Thaw overnight in the fridge before reheating.
FAQs
Can I use pickle juice from any type of pickle?
Yes! Dill pickle juice is classic for this recipe, but you can experiment with spicy or garlic pickle juice for different flavor twists. Just be mindful of the salt content.
Is it necessary to marinate the chicken in pickle juice?
While you can skip marinating, it really enhances the flavor and tenderness. Even a short 30-minute soak makes a noticeable difference.
Can I bake this chicken instead of frying?
Absolutely! Baking is a healthier option. Bake on a wire rack at 425°F for 20-25 minutes, flipping halfway, until golden and fully cooked.
What sides go well with Crispy Dill Pickle Parmesan Chicken?
This chicken pairs beautifully with roasted vegetables, mashed potatoes, or something fresh like a crisp salad. If you want some snack ideas for game day, check out my Super Bowl Snack Playboard for inspiration!
There you have it—a recipe that’s as fun to make as it is to eat. Next time you want something crispy, tangy, and comforting, give this Crispy Dill Pickle Parmesan Chicken a try. It’s a great way to spice up your dinner rotation without any fuss.
Don’t forget to explore more cozy recipes and kitchen inspiration over at Navy at Home, where comfort food meets creativity every day!
For more delicious recipes and kitchen tips, be sure to follow our Pinterest page — your new favorite spot for food inspiration.
Crispy Dill Pickle Parmesan Chicken
Ingredients
Equipment
Method
- Step 1: Marinate the chicken breasts in dill pickle juice in a shallow dish or zip-top bag. Refrigerate for at least 30 minutes, ideally 1 to 2 hours.
- Step 2: Prepare three shallow dishes: Dish 1 with flour, garlic powder, onion powder, paprika, salt, and pepper; Dish 2 with whisked eggs; Dish 3 with Parmesan cheese and seasoned breadcrumbs combined.
- Step 3: Remove chicken from marinade and pat dry. Dredge each piece in seasoned flour, dip in eggs, then press into Parmesan-breadcrumb mixture to coat thoroughly.
- Step 4: Heat about ½ inch of cooking oil in a large skillet over medium-high heat. Test oil by dropping a pinch of breadcrumb; it should sizzle immediately.
- Step 5: Fry chicken pieces in hot oil, avoiding overcrowding, for 5 to 7 minutes per side until golden brown and internal temperature reaches 165°F. Remove and drain on a wire rack.
- Step 6: Let chicken rest for a few minutes before serving to allow juices to redistribute and keep the meat moist.