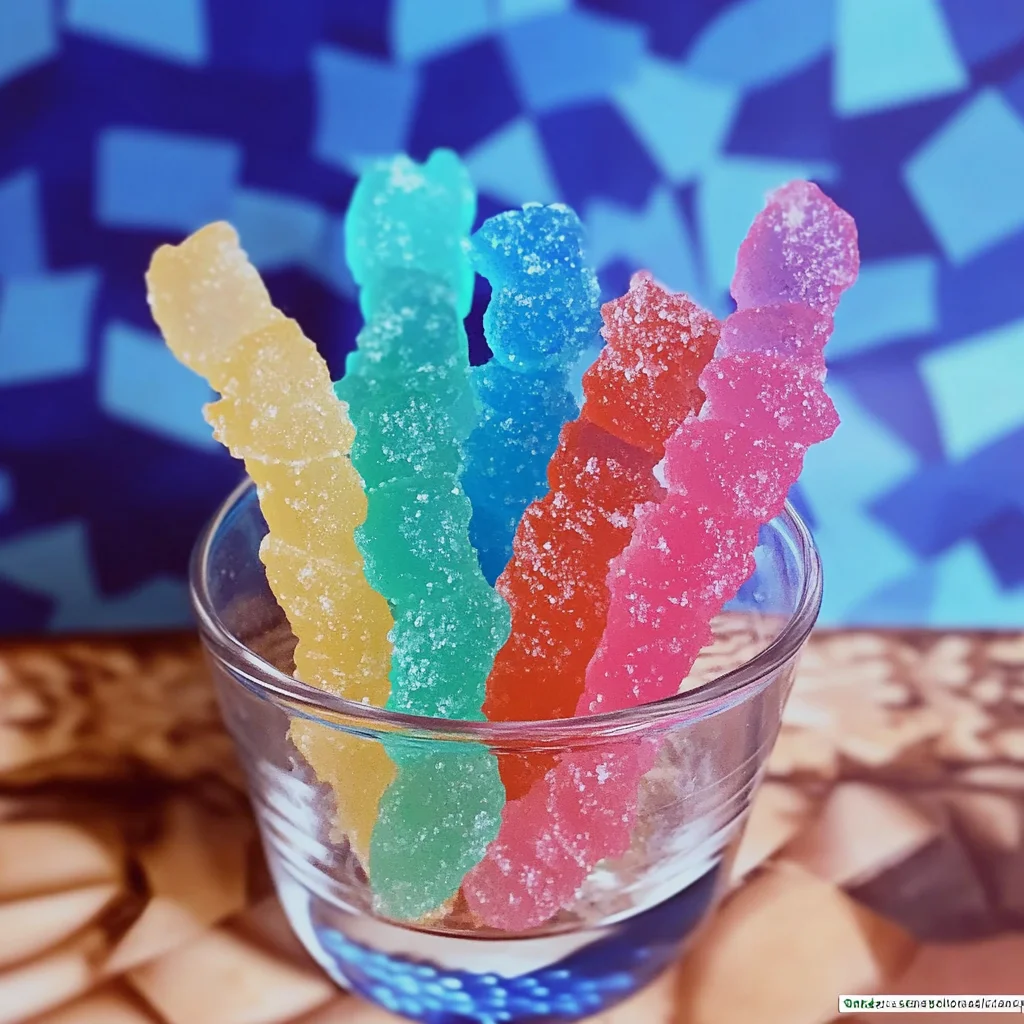
There’s something magical about watching sugar crystals grow and transform right before your eyes. Remember those childhood days when candy wasn’t just a treat, but a little science experiment wrapped in sweetness? Making rock candy at home brings back that nostalgic joy, combining the wonder of crystallization with a deliciously sweet reward. Plus, it’s incredibly fun and surprisingly easy to pull off, even if you’re not a seasoned candy maker. Whether you want a unique gift, a party favor, or just a sweet project for a cozy afternoon, homemade rock candy is a delightful choice.
In this guide, I’ll walk you through every step to create your own vibrant, crystal-coated sticks. You’ll see how simple ingredients and a little patience can turn into dazzling candy that’s sure to impress. If you’re as excited as I am to get started, let’s dive in!
Why You’ll Love Rock Candy
- Fast: While the crystal growth takes a few days, the active prep and setup barely take 30 minutes.
- Easy: Minimal ingredients and simple steps make this a great beginner-friendly candy project.
- Giftable: Beautiful, colorful rock candy makes a charming homemade gift that anyone will adore.
- Crowd-pleasing: Kids and adults alike are mesmerized by the sparkling crystals and love nibbling on these treats.
Ingredients
Here’s what you need to get started. Don’t worry, these are all common pantry items or easy-to-find craft supplies:
- 1 cup water: This is the base for your sugar solution—the clarity of water affects how clear your crystals look.
- 3 cups granulated sugar: The star of the show! The sugar will dissolve and then recrystallize, forming your rock candy.
- Wooden lollipop sticks: These serve as the structure for your crystals to grow on. You can also use popsicle sticks.
- Popsicle sticks: Used to hold the candy sticks in place across the jar opening.
- Clothespins: These help suspend the sugar-coated sticks in the jar without touching the bottom or sides.
- Quart-size wide-mouth mason jars: Perfect containers for your sugar solution and crystal growth.
- Gel food coloring: Adds fun color to your candy and makes it visually stunning. Gel works best for vibrant hues without watering down your solution.
- Flavor extract (optional): Vanilla, peppermint, or lemon extracts can add a delicious twist to your candy’s flavor profile.
How to Make Rock Candy
Now that you have everything ready, let’s make some magic happen. Follow these steps carefully, and you’ll be rewarded with beautiful, homemade rock candy:
- Prep the sticks: Dip each wooden stick into water to moisten it, then immediately roll the wet section in granulated sugar until well coated. This sugar layer acts as “seed crystals” to help the candy grow faster. Place the sticks on a flat surface and let them dry completely. This step is crucial—without it, your crystals won’t cling properly.
- Make the sugar solution: In a large pot over medium heat, combine 1 cup water and 3 cups granulated sugar. Stir constantly until the sugar fully dissolves and the mixture comes to a rolling boil. This ensures a saturated sugar solution, perfect for crystal growth.
- Add color and flavor: Remove the pot from heat. Stir in your gel food coloring and flavor extract, if you’re using any. This is where you can get creative—try bright reds for a cherry flavor or blues for a cool mint vibe.
- Cool the solution: Let the sugar solution sit for about 20 minutes to cool down slightly. Pouring it too hot into the jars can cause cracks or uneven crystal growth.
- Pour into jars: Carefully pour the cooled sugar solution into your mason jars, leaving about an inch of space at the top to prevent spillover.
- Insert the sticks: Lay a popsicle stick across the top of each jar. Attach the sugar-coated wooden stick to a clothespin and lower it into the jar so the coated part is submerged but not touching the bottom or sides. This setup prevents the crystals from sticking to unwanted surfaces and helps them grow evenly.
- Let crystals grow: Place the jars in a clean, undisturbed spot where they won’t be jostled or shaken. Let them sit for about 5 days. Patience is key here—the longer you wait, the larger and more beautiful your crystals become.
- Harvest your candy: After 5 days, you’ll see stunning sugar crystals all over your sticks. Gently break any hardened sugar layer on the surface of the liquid. Carefully lift the rock candy sticks out of the jars.
- Dry the candy: Transfer your rock candy to a clean jar or stand them upright in a cup to dry completely. If the sticks stick to the jar sides, carefully loosen them with a knife. Be gentle—removing crystals attached to the bottom can break them.
If you want a fun variation, you can even try making glow-in-the-dark rock candy by following a similar crystal-growing technique used in the glow dark moon rocks craft. It’s a fascinating twist on this classic recipe!
Substitutions & Additions
Feel free to tweak this recipe to suit your taste or make it easier with what you have on hand. Here are some ideas:
- Sweetener swaps: While white granulated sugar works best for clear crystals, you can experiment with raw sugar or turbinado for a rustic look, though the crystals may be less defined.
- Different sticks: If you don’t have lollipop or popsicle sticks, wooden skewers or even clean chopsticks can work as alternatives.
- Flavor combinations: Try adding almond extract, cinnamon, or even a drop of rose water for a unique flavor profile. Just remember, a little goes a long way!
- Color blends: Mix two gel colors for a marbled or ombré effect on your crystals. It’s a stunning way to customize your candy.
- Edible glitter: Dust the finished rock candy with edible glitter for an extra sparkle that’s perfect for parties or gifts.
For more creative homemade treats with simple ingredients, you might enjoy trying recipes like the pineapple upside-down sugar cookies or the cozy moist banana bread. Both are easy to make and sure to bring smiles to your kitchen!
Tips for Success
Making rock candy is straightforward, but a few tricks can ensure your crystals turn out spectacular every time:
- Patience is your best friend: Don’t rush the crystal growth. The longer you let the sticks sit undisturbed, the bigger and clearer your crystals will be.
- Seed your sticks well: The sugar coating on your sticks is essential for the crystals to latch onto and start growing. Make sure the sticks dry completely before placing them in the jars.
- Keep jars still: Movement can disrupt the crystal formation, causing small or misshapen crystals. Find a quiet spot out of direct sunlight and avoid the temptation to check too often.
- Use wide-mouth jars: These allow easy access to place and remove sticks without damaging the crystals.
- Cool the solution properly: Pouring hot syrup into jars can cause premature crystallization on the jar sides or a layer on top, which can interfere with growth.
Here’s a little secret from my own experience: I like to label my jars with the date and flavor/color combination. That way, if you decide to experiment with different flavors or colors, you can keep track of what works best. Plus, it’s fun to compare your crystal growth progress day by day!
How to Store Rock Candy
Once your rock candy is dry and ready, proper storage is key to keeping it crunchy and beautiful:
- Use airtight containers: Store your rock candy sticks in glass jars with tight-fitting lids or sealed plastic bags to protect them from moisture.
- Keep in a cool, dry place: Avoid humid areas like the kitchen near a stove or dishwasher, as moisture can cause your candy to become sticky or dissolve.
- Shelf life: Stored properly, your homemade rock candy can last for several months. However, it’s best enjoyed within 1 to 2 months for the best texture and flavor.
If you’re gifting your rock candy, wrapping each stick in clear cellophane tied with a ribbon not only looks charming but helps keep moisture out. It’s a simple way to elevate your homemade treat into a thoughtful present.
FAQs
Q: Can I use brown sugar instead of white sugar?
A: Brown sugar contains molasses, which can affect crystal clarity and growth. White granulated sugar is best for shiny, clear crystals, but you can try brown sugar for a rustic look—just expect smaller or less transparent crystals.
Q: How long does it take for crystals to start forming?
A: You’ll usually see the first tiny crystals form within 24 to 48 hours, but optimal growth takes about 5 days or more.
Q: What if my crystals are dull or not growing well?
A: Make sure your sugar solution is fully saturated and that the sticks are properly seeded with sugar. Also, avoid disturbing the jars during the growth period and ensure the solution has cooled before pouring.
Q: Can I make rock candy without food coloring?
A: Absolutely! Rock candy looks beautiful in its natural clear form, which can be perfect for a classic look or when you want to showcase the pure crystal structure.
If you love exploring simple, fun recipes that bring a smile and a sweet treat, be sure to check out more unique ideas like the easy flavorful chicken ramen or the crowd-pleasing Big Mac sliders. These recipes are all about making life in the kitchen joyful and stress-free!
Enjoy your sweet rock candy adventure! Don’t forget to share your dazzling creations and tag your photos for a chance to inspire others.
For even more fun recipes and kitchen inspiration, follow us on Pinterest and keep your culinary creativity sparkling!
Homemade Rock Candy
Ingredients
Equipment
Method
- Step 1: Dip each wooden stick into water to moisten it, then immediately roll the wet section in granulated sugar until well coated. Place sticks on a flat surface and let dry completely.
- Step 2: In a large pot over medium heat, combine 1 cup water and 3 cups granulated sugar. Stir constantly until sugar dissolves and mixture reaches a rolling boil.
- Step 3: Remove pot from heat. Stir in gel food coloring and flavor extract if using.
- Step 4: Let the sugar solution cool for about 20 minutes.
- Step 5: Carefully pour the cooled sugar solution into mason jars, leaving about an inch of space at the top.
- Step 6: Lay a popsicle stick across each jar opening. Attach a sugar-coated wooden stick to a clothespin and lower it into the jar so it is submerged without touching jar sides or bottom.
- Step 7: Place jars in a clean, undisturbed spot. Let crystals grow undisturbed for about 5 days.
- Step 8: After 5 days, gently break any hardened sugar layer on top, carefully remove the rock candy sticks from jars.
- Step 9: Transfer rock candy to a clean jar or stand upright in a cup to dry completely. Loosen any stuck crystals carefully with a knife.